Merchandise Category Pages
On this page
Algolia Category Merchandising capabilities include:
- Pin and hide items
- Boost, bury, and filter categories
- Display banners
- Merchandise based on applied filters, date range, geolocation, device, and user segment
For more information, please refer to the Category Merchandising Features Overview section of this page.
This guide gives you an overview on how to merchandise category pages using the visual and manual editors in the Algolia dashboard. It also gives you an overview of how to do so using Algolia’s API Client or REST API.
The guide doesn’t cover the steps to implement and merchandise category pages using the Magento or Shopify extensions. You can learn about those extensions on these pages.
Implementation steps
There are two-steps to implement this solution.
- Build the category pages with Algolia
- Merchandise the category pages with Algolia
1. Build the category pages with Algolia
To merchandise category pages with Algolia, you must first create category pages powered by Algolia. You can find the detailed steps in the guide on how to implement category pages with Algolia.
2. Merchandise the category pages with Algolia
Algolia offers three ways to merchandise :
- Using the Visual Editor in the dashboard
- Using the Manual Editor in the dashboard
- Build your own custom merchandising UI using the Rules API
Category merchandising features overview
| Merchandising Options | Functionalities |
| Visual Editor | • Pin and hide items • Boost, bury, and filter categories • Set priority on category ordering • Ban categories of items • Merchandise on filter selection • Merchandise based on date range, for time-limited promotions • Merchandise based on geolocation, device, user segment • Configurable preview UI |
| Manual Editor | • Display banners • Merchandise on filter selection • Facet Merchandising (Facet type and value reordering) |
| Build your own custom merchandising UI using Algolia’s Rules API |
• Be creative with the features made available with Algolia’s Rules API |
Using the Visual Editor in the dashboard
You can navigate to this page through these steps:
- Select the Rules section from the left sidebar menu in the Algolia dashboard.
- Under the heading Rules, select the index you are adding a Rule to.
- Select New rule. In the dropdown, click on the Visual Editor option.
To start merchandising a category, you need to tie a filter value to a promotional rule to trigger the Rule on a category page. In this guide, categoryId is a facet attribute available in each product record. It’s a unique identifier that links to all category pages the product is tied to. The name of this facet attribute can change depending on your data structure, such as categories, categoryPageId, collections, or catId.
Please check with your data team to make sure that you have the correct category page identifier set up as attributesForFaceting in the dashboard. This filter is the facet value your engineering team uses to query the products on the front-end category page. Learn more about category page identifiers.
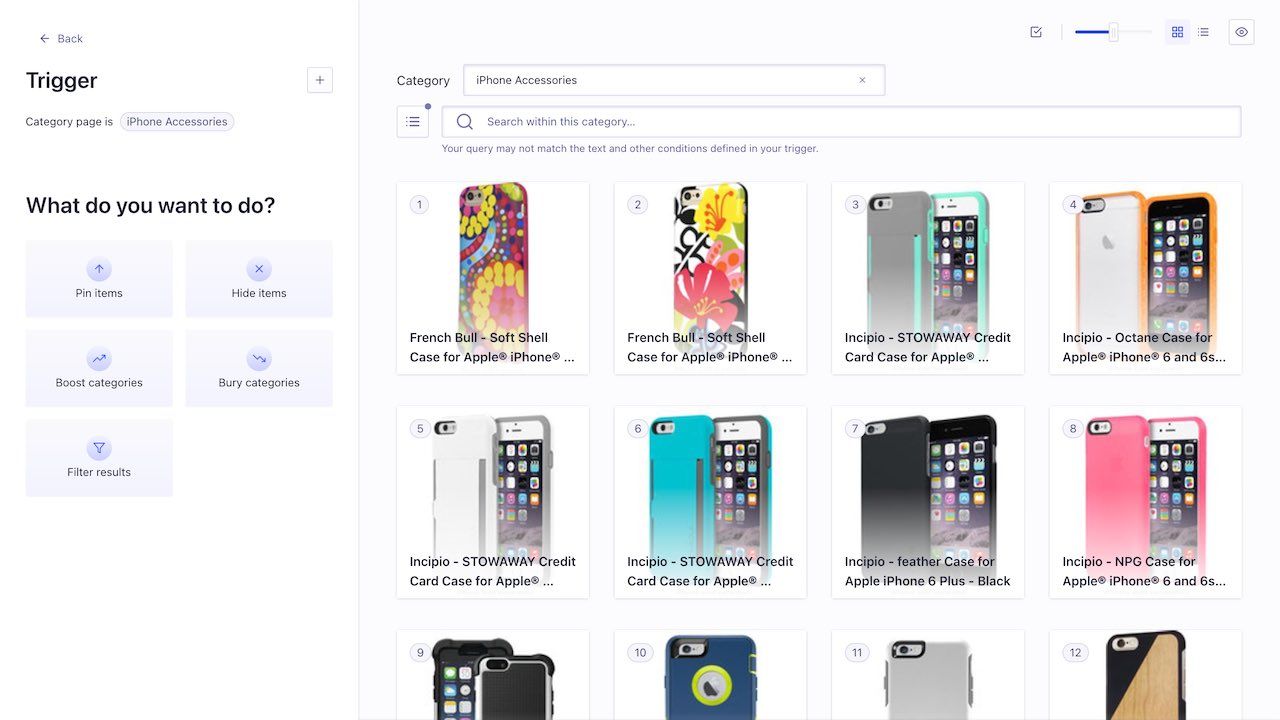
In the UI, you need to set a Condition and a Consequence of a rule.
Condition
- Under It all starts here section, select Choose category page.
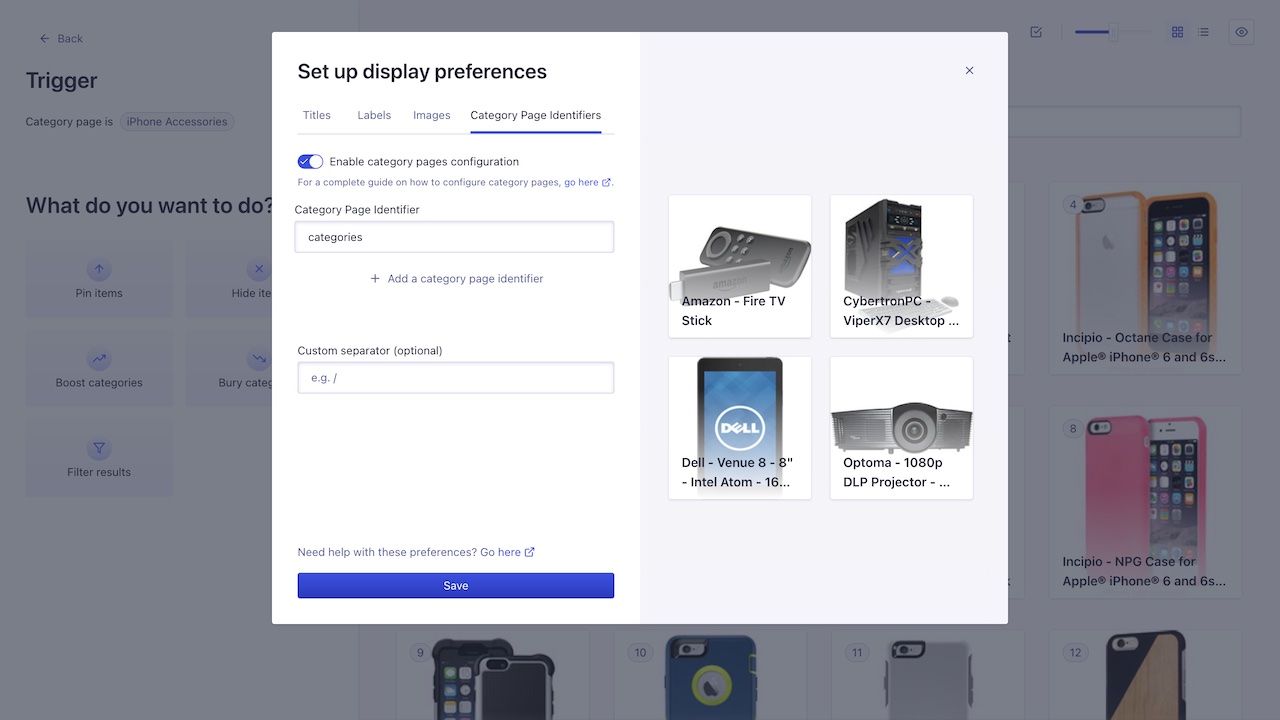
- During the initial set up, you will be prompted to configure the Category Page Identifiers under Set up display preferences > Category Page Identifier.
- Select your category page identifier under the dropdown for Category Page Identifier
- Add a symbol under “Custom subcategory separator” if your category page identifier is using a hierarchical structure such as
Women > Coat > Raincoat. In this example, the custom subcategory separator will be>. Setting up a Custom subcategory separator allows you to browse and navigate between hierarchical levels in the UI.
- After you configure the Category Page Identifier for the index, you will see a different screen that allows you to select the name of the category page and set up merchandising rules.
Set up display preference > Category Page Identifier
Choose category page > Select triggering category for the rule

Consequence
Under What do you want to do section, select any of the options in the menu or start to drag them to the preview UI to start merchandising.
For more information, take a look at the guides on how to merchandise on category pages and how to implement filters in Rules.
Using the Manual Editor in the dashboard
The manual editor is flexible when it comes to category merchandising. There are a variety of different use cases you can build with the manual editor, such as adding a banner on filter selection and facet merchandising. This is covered in depth in a separate section – coming soon.
Build your own custom merchandising UI using the Rules API
You can build your own UI on top of Algolia’s Rules API. Here are some useful resources to help you with that:

