Google Tag Manager
On this page
If you have already integrated Google Tag Manager (GTM) on your website, you can leverage this solution to send click, conversion and view events to the Algolia Insights API.
The setup consists of two parts:
- Update HTML of your web page to expose Algolia-related properties
- Setup in the Google Tag Manager dashboard
Update your website
Update your search parameters
You need to pass clickAnalytics: true to retrieve queryID which is needed to track events. You also need to pass userToken to search queries, which connects between search queries and events.
1
2
3
4
5
6
index.search('query', {
  userToken: 'user-1',
  clickAnalytics: true
}).then(({ hits, queryID }) => {
  console.log(hits, queryID);
})
Update your HTML
This guide expects your Algolia hits to be rendered with the following data attributes within your HTML:
data-insights-index: tag a DOM node that contains both your filters and hits to capture events related to both.data-insights-object-iddata-insights-position(starting from 1)data-insights-query-iddata-insights-filter
1
2
3
4
5
6
7
8
9
10
11
12
13
14
15
16
17
18
19
20
21
22
23
24
25
26
const indexName = <your-index-name>;

index.search('query', {
  userToken: 'user-1',
  clickAnalytics: true
}).then(({ hits, queryID }) => {
  const container = document.querySelector('<your-selector>');

  container.innerHTML = `
    <div data-insights-index="${indexName}">
      <div id="hits">
        ${
          hits.map((hit, arrayIndex) => `
            <div class="hit"
                data-insights-object-id="${hit.objectID}"
                data-insights-position="${arrayIndex + 1}"
                data-insights-query-id="${queryID}"
            >
              <!-- ... -->
            </div>
          `).join('')
        }
      </div>
    </div>
  `
});
If you want to track filter events, you need to add a data-insights-filter attribute to each filter element.
Format: ${attribute}:${value}, for example, brand:Apple.
1
2
3
4
5
<ul>
  <li data-insights-filter="brand:Apple">Apple</li>
  <li data-insights-filter="brand:HP">HP</li>
  <li>...</li>
</ul>
Send the userToken to Google Tag Manager
You need to send the userToken to GTM whenever it changes.
1
2
3
window.dataLayer.push({
  algoliaUserToken: 'user-1',
});
If you’re using search-insights, you can relay the userToken from search-insights to GTM.
1
2
3
4
5
aa('onUserTokenChange', (userToken) => {
  window.dataLayer.push({
    algoliaUserToken: userToken,
  });
}, { immediate: true });
onUserTokenChange method is supported in search-insights >= v1.5.0.
Send Hits Viewed event
Unlike click event on DOM elements, GTM isn’t aware when search results are re-rendered on client-side. Whenever it happens, you need to send an event to GTM, so that it can form a payload to send to Algolia Insights API.
1
2
3
4
5
6
index.search('query', { /* ... */ }).then(({ hits, queryID }) => {
  const container = document.querySelector('<your-selector>');
  container.innerHTML = `...`

+  dataLayer.push({ event: 'Hits Viewed' });
});
You can learn more about the Insights middleware if you are using InstantSearch.js or Vue InstantSearch.
Setup in the Google Tag Manager dashboard
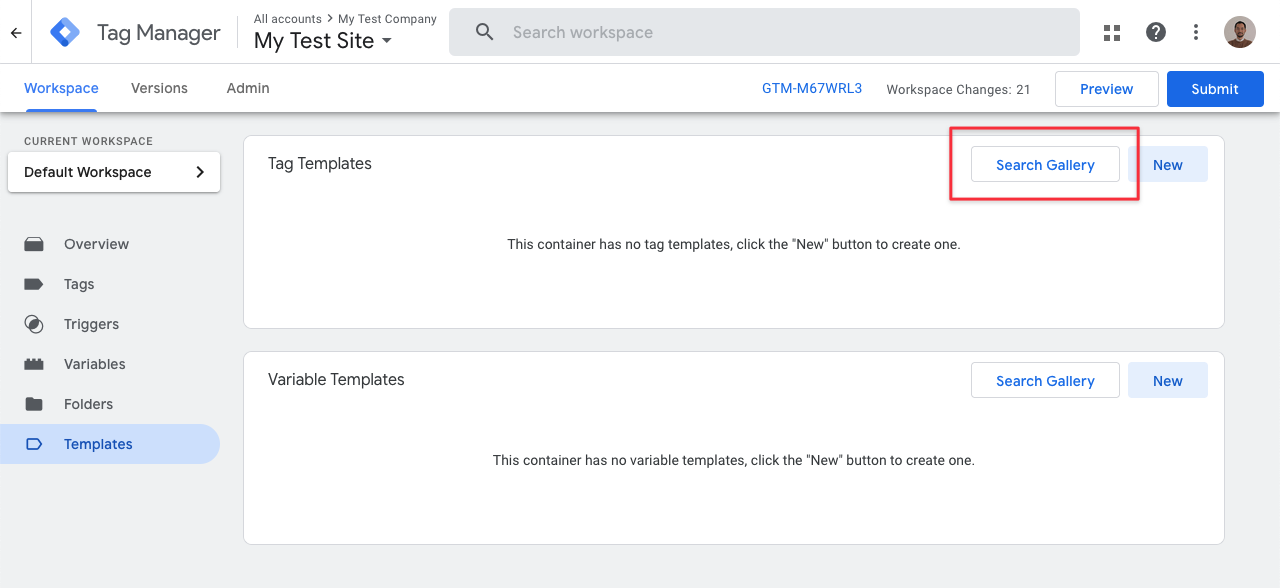
Before sending events to the Insights API via Google Tag Manager (GTM), you need to import the official Algolia Search Insights template.
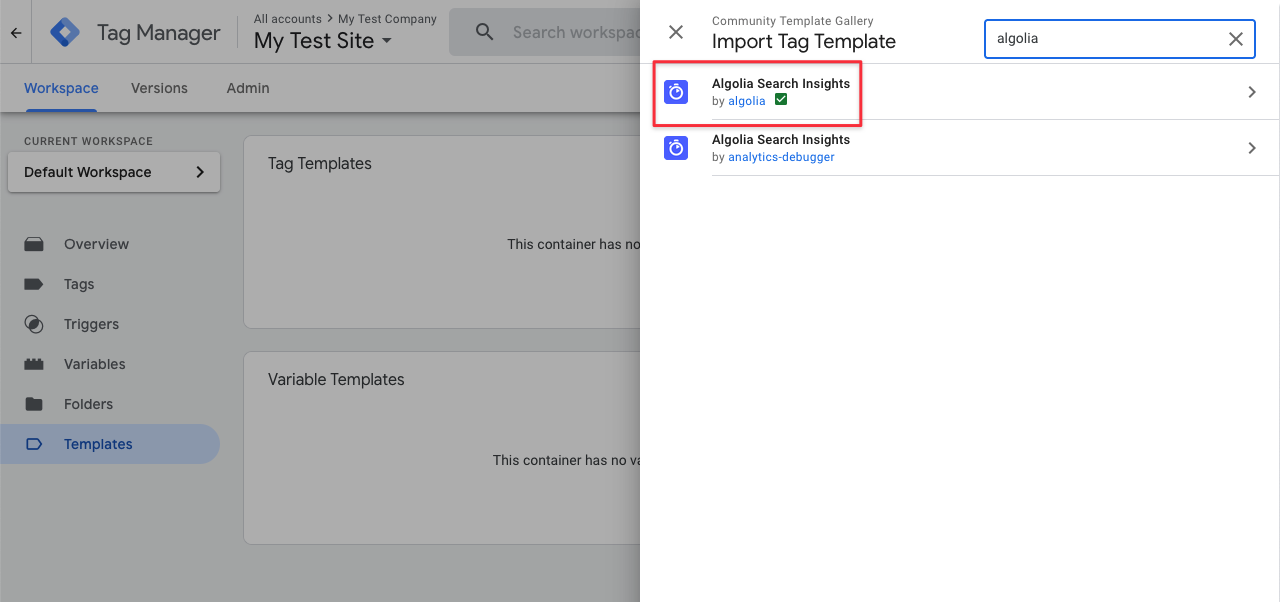
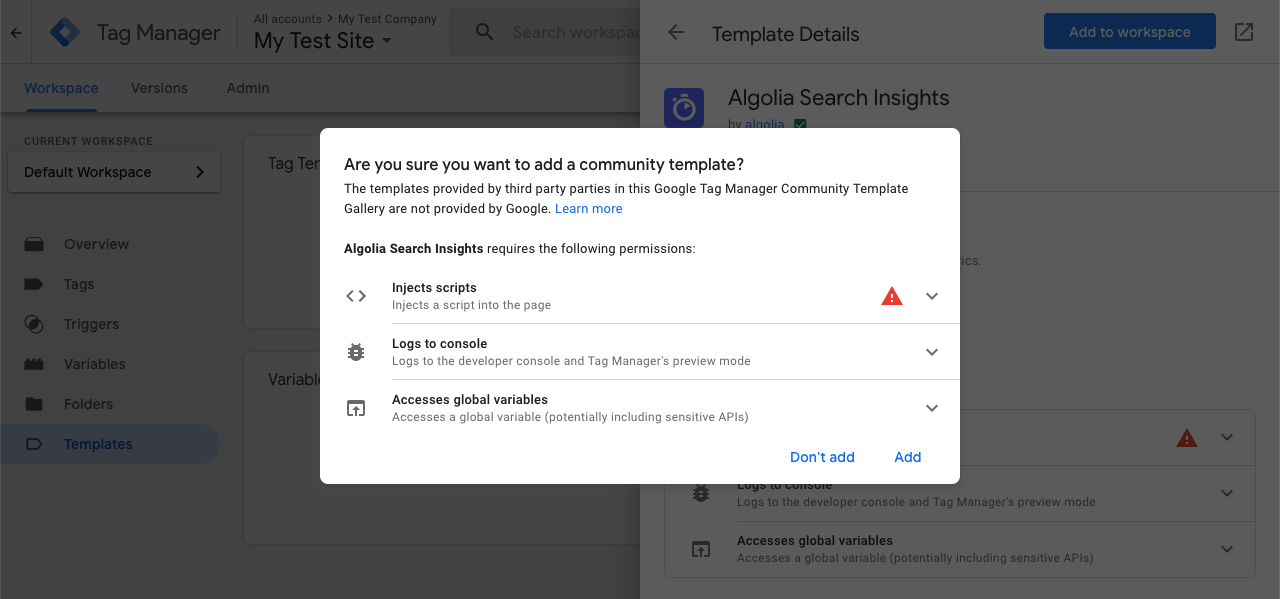
In GTM, click on the Search Gallery button in the Tag Templates section of your Workspace, search for the official Algolia Search Insights tag template and add it to your workspace.
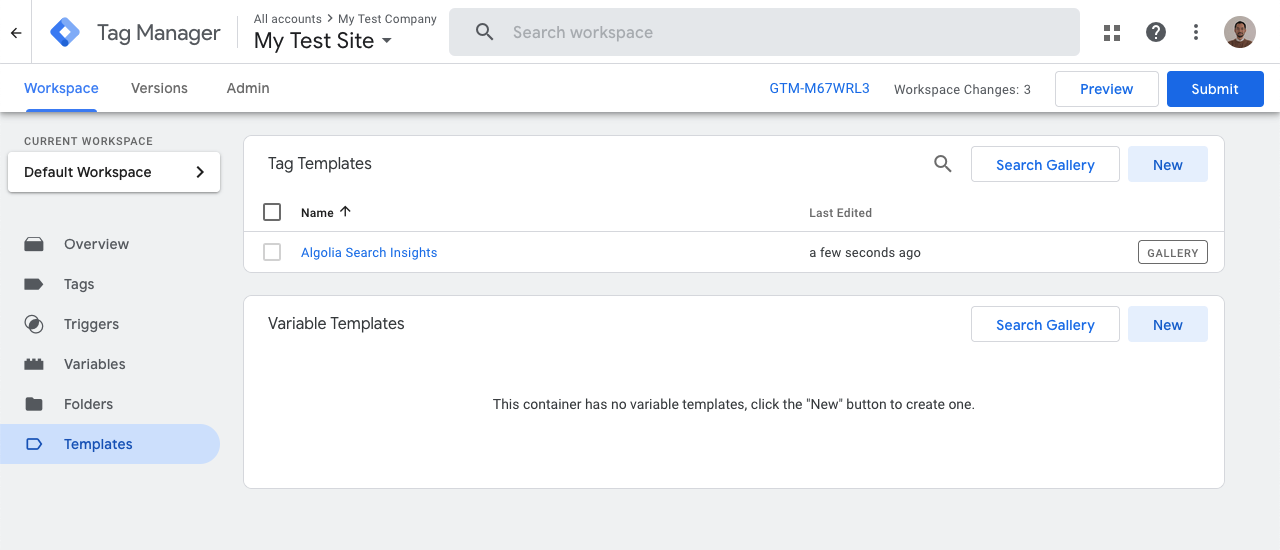
Once added, you should see the below screen:
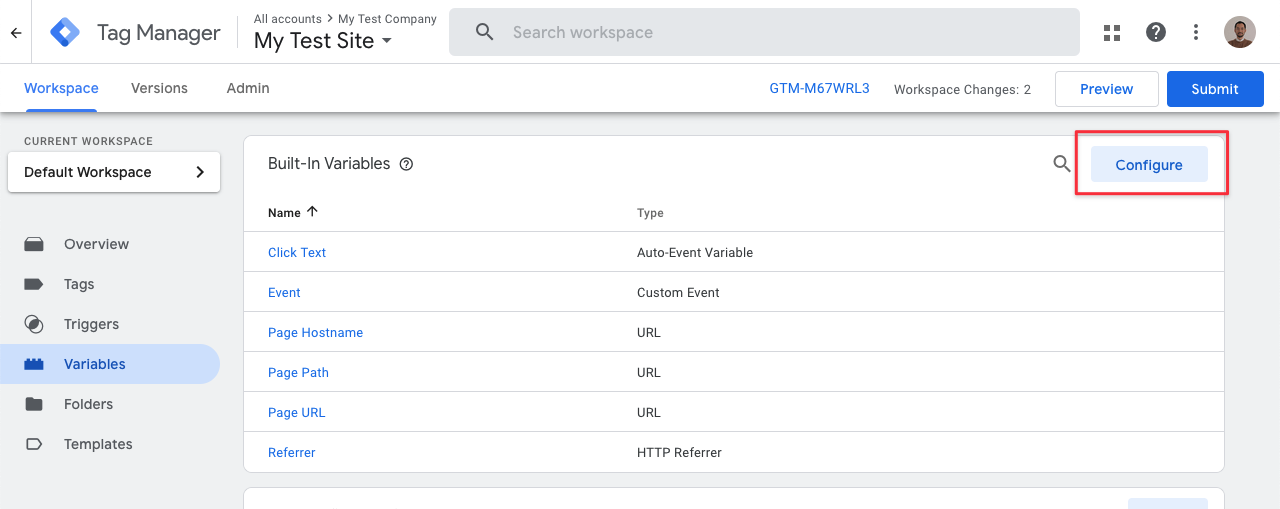
Variables
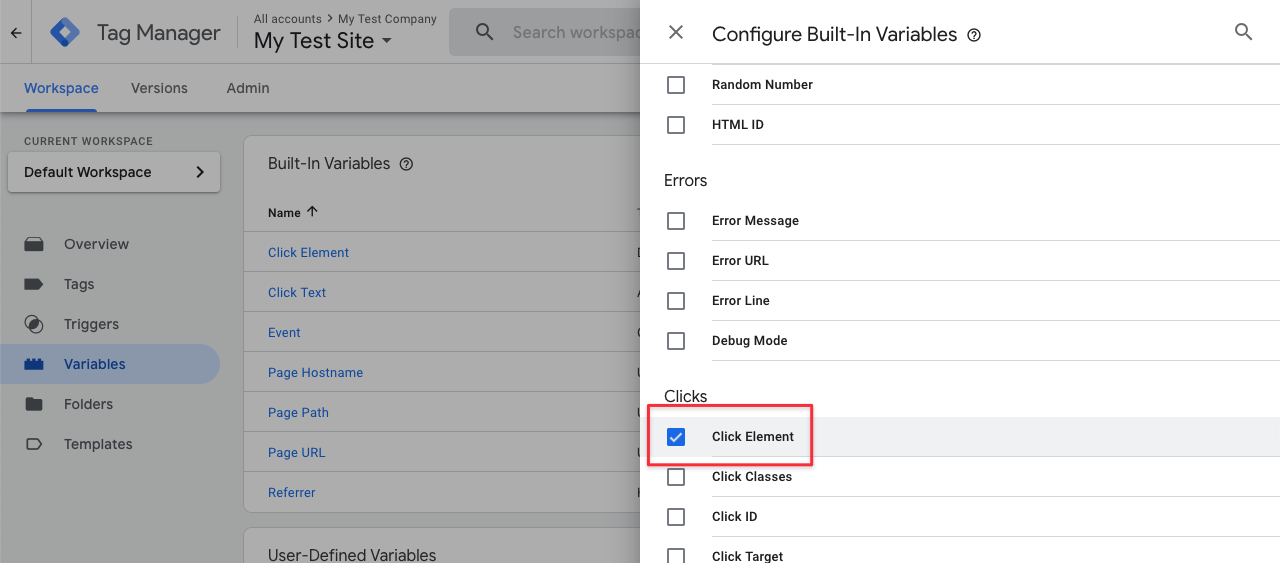
Add built-in variable
First, add the built-in variable Click Element. This variable is used to retrieve the data associated with the various clicks.
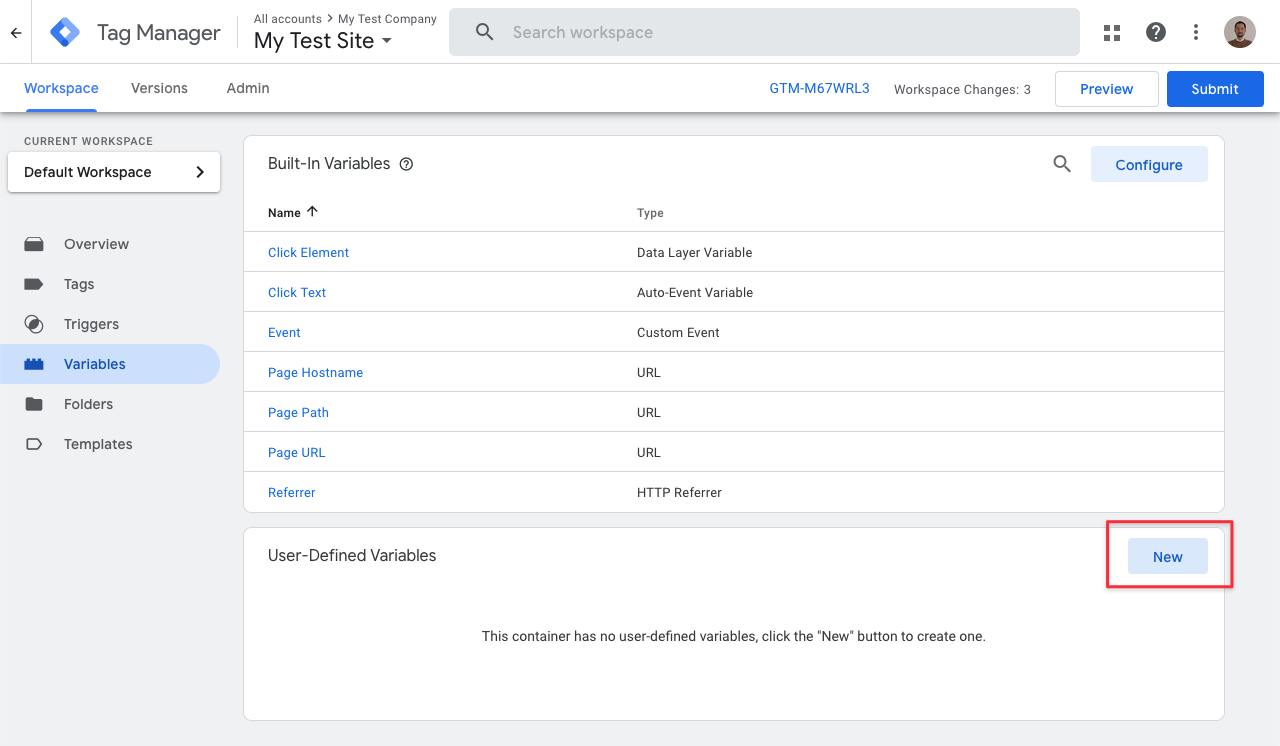
Create user-defined variables
For events to be sent with the correct information from your Algolia implementation, you need to add variables in the User-Defined Variables section:
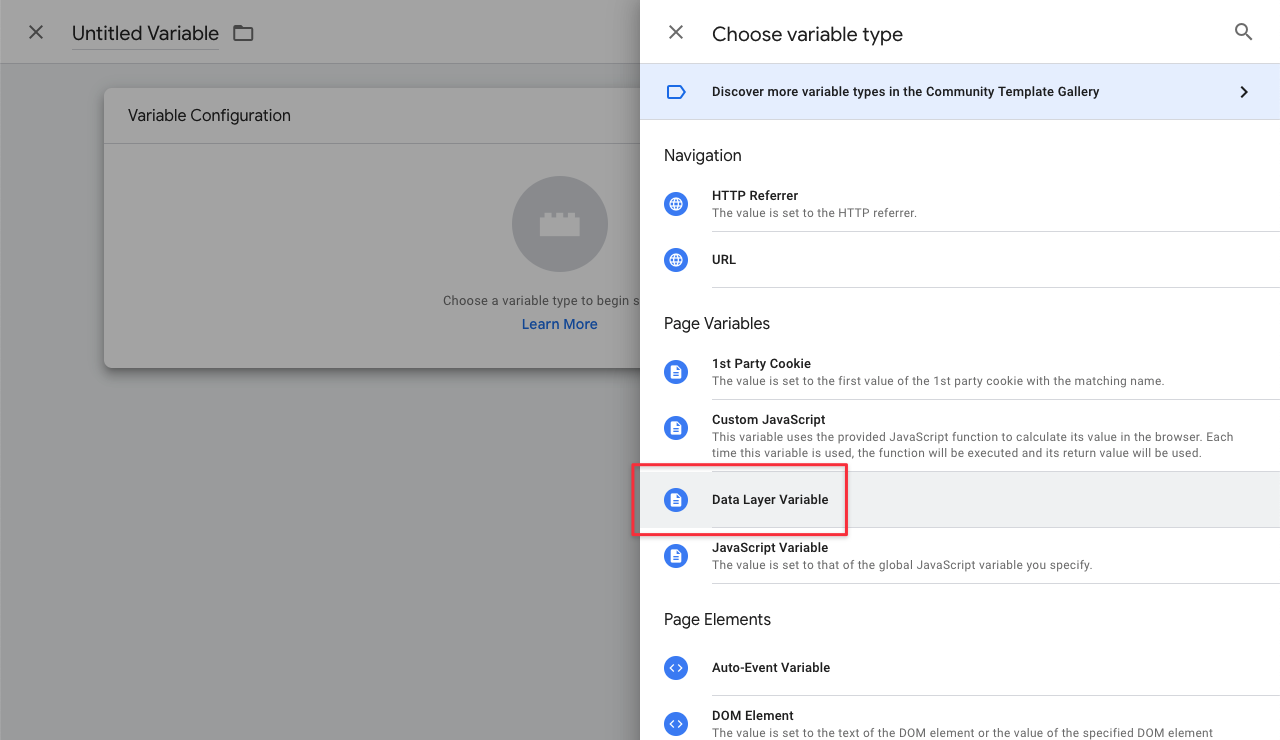
- Data Layer Variable
Algolia Insights User Token
- Custom JavaScript
Algolia Get Data AttributesAlgolia Insights IndexAlgolia Insights ObjectIDsAlgolia Insights PositionsAlgolia Insights QueryIDAlgolia Insights Viewed FiltersAlgolia Insights Clicked Filters
Algolia Insights User Token
Click “New” button in the User-Defined Variables section. Choose “Data Layer Variable” as variable type.
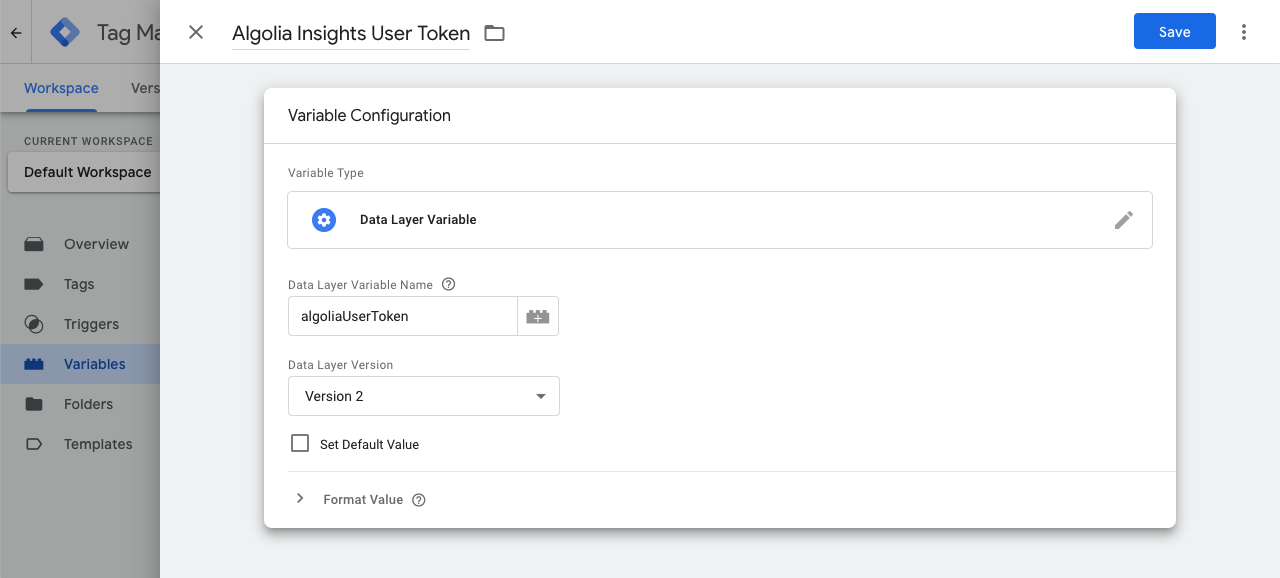
- Variable Name:
Algolia Insights User Token - Data Layer Variable Name:
algoliaUserToken
Algolia Get Data Attributes
Click “New” button in the User-Defined Variables section. Choose “Custom JavaScript” as variable type.
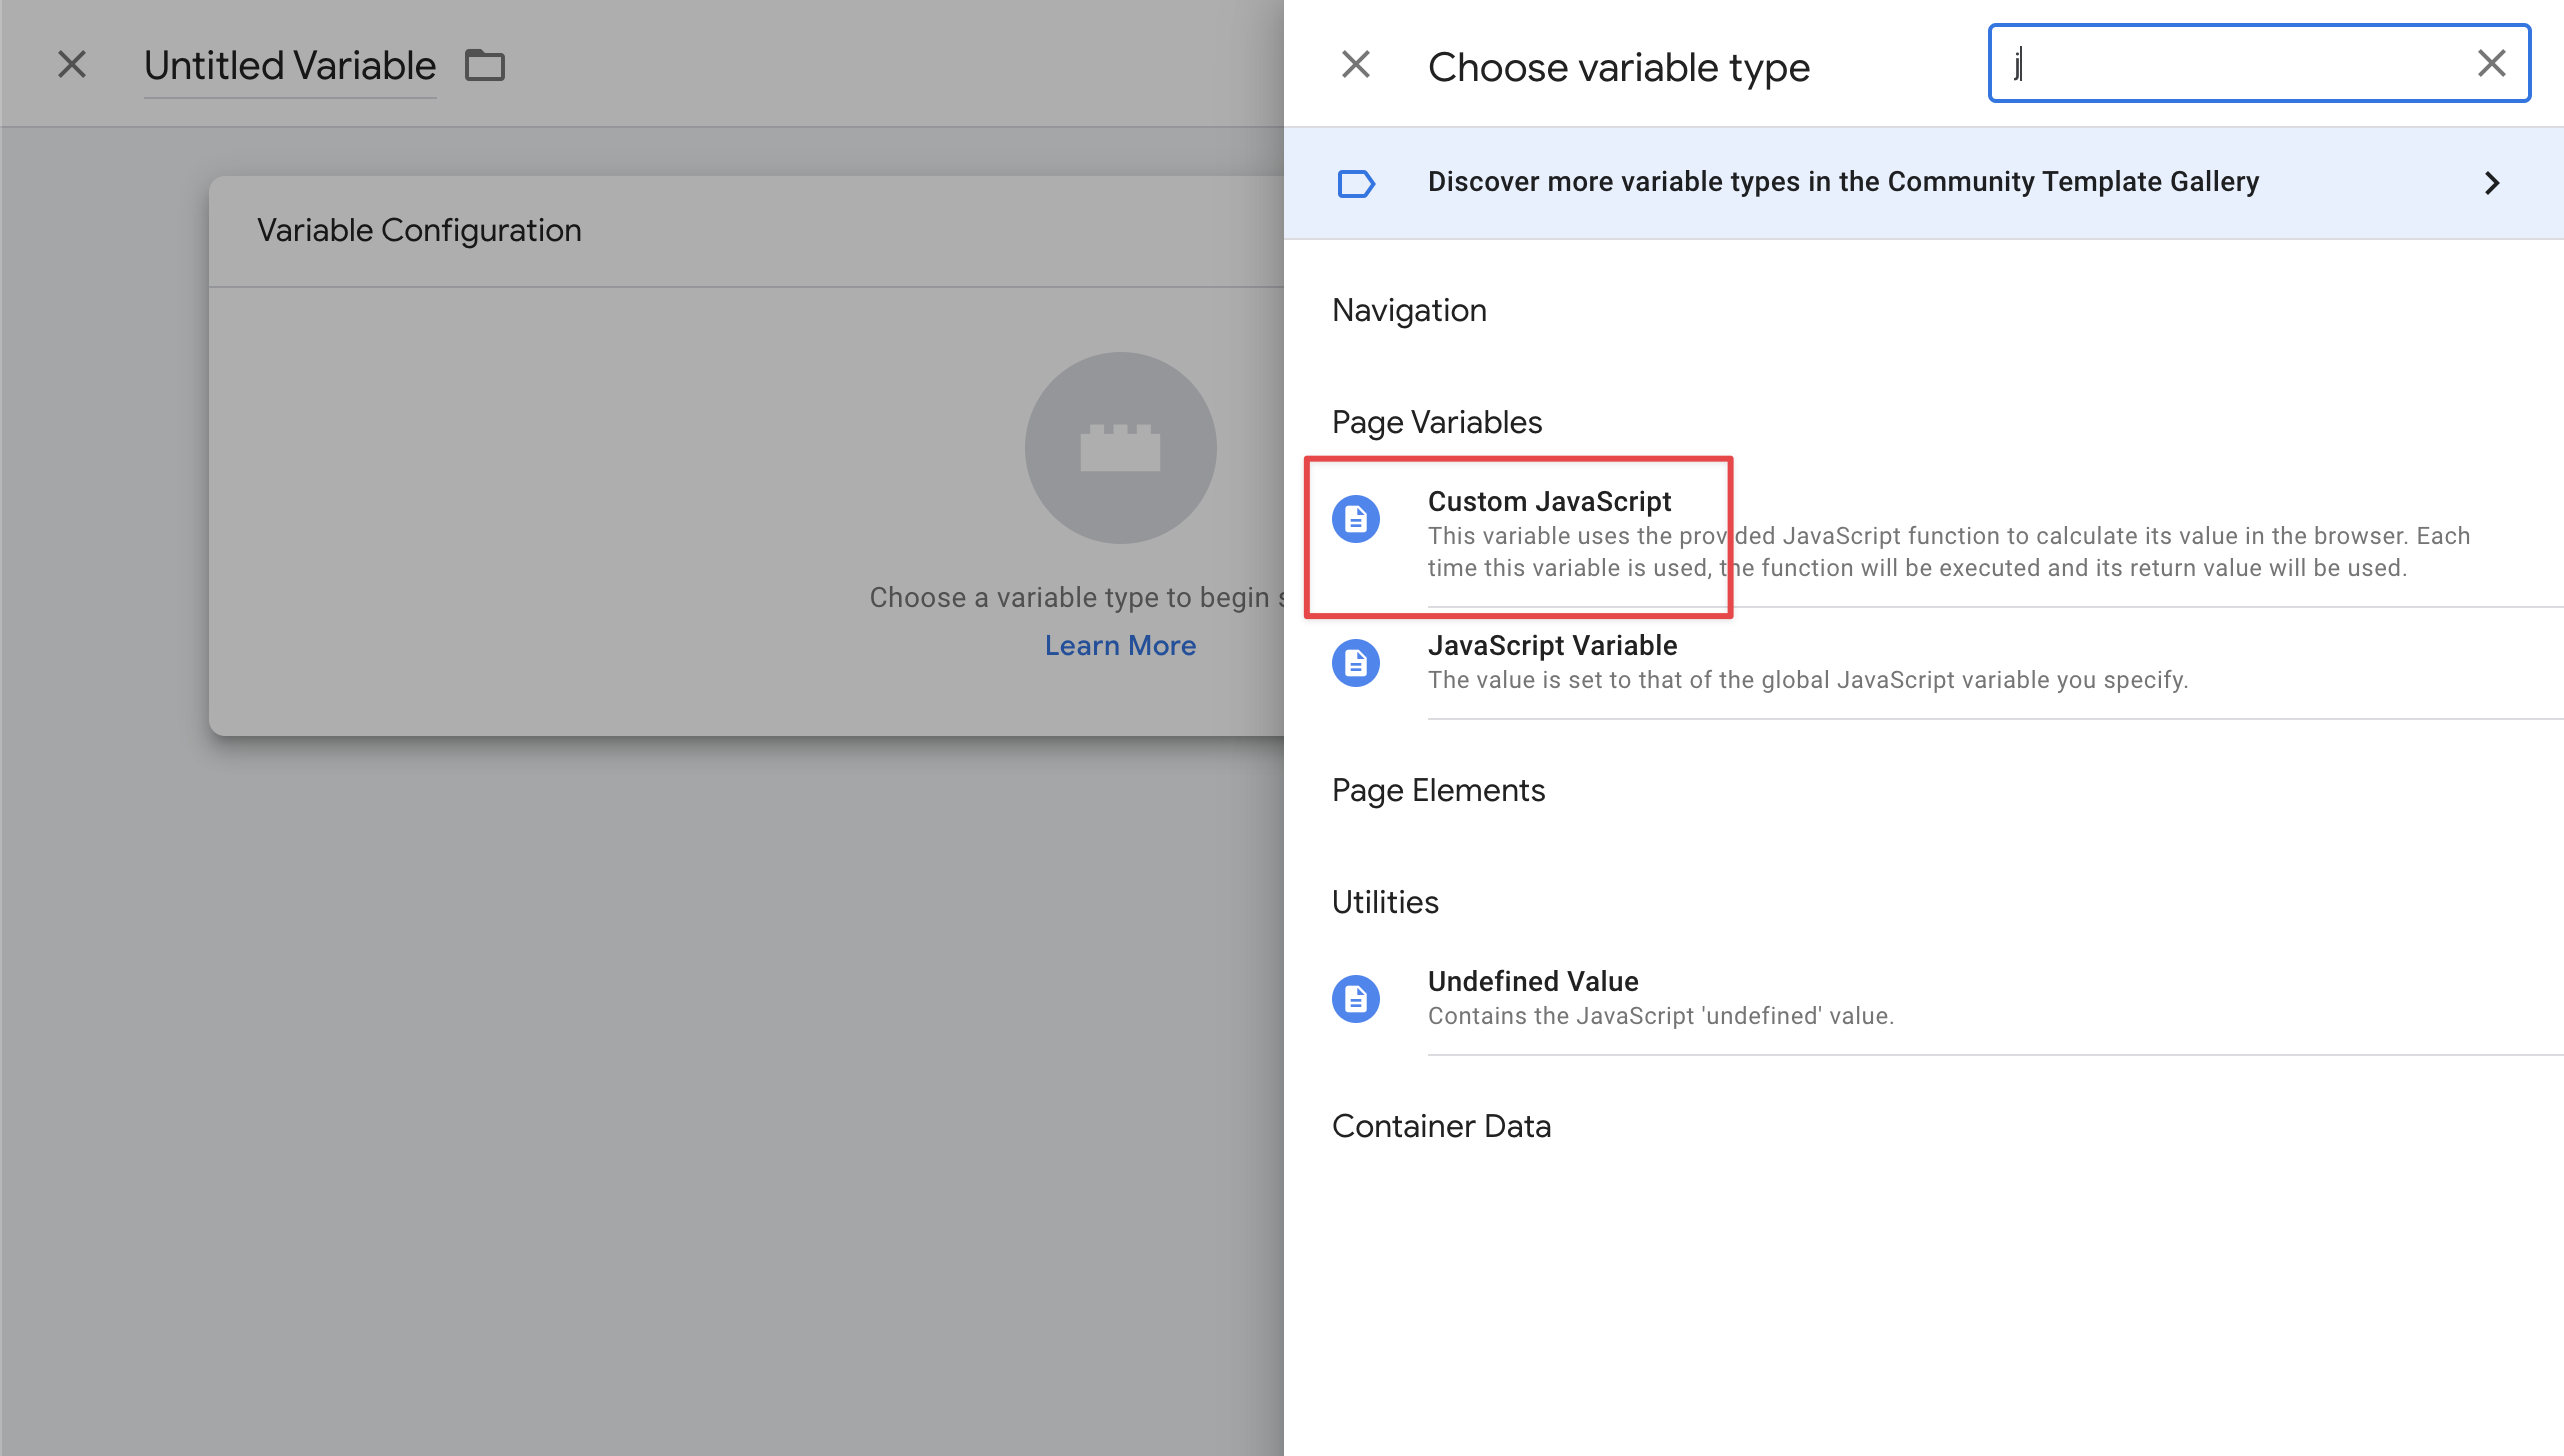
- Variable Name:
Algolia Get Data Attributes - Custom JavaScript:
1
2
3
4
5
6
7
8
9
10
11
12
13
14
15
16
17
18
19
20
21
22
23
24
25
26
function() {
  function findClosest(target, selector) {
    while (!target.matches(selector) && !target.matches('body')) {
      target = target.parentElement;
    }
    return target.matches(selector) ? target : undefined;
  }

  return function (attributeName, containerQuerySelector) {
    var clickedElement = {{Click Element}};
    // search for children of the selector
    var elements = clickedElement
      ? [findClosest(clickedElement, '[' + attributeName +']')]
      : Array.from(document.querySelectorAll((containerQuerySelector || '') + ' [' + attributeName + ']')).filter(Boolean);

    if (elements.length === 0 && containerQuerySelector) {
      // see if it matches the container itself
      // for example, `#app[data-insights-index]`
      elements = Array.from(document.querySelectorAll(containerQuerySelector + '[' + attributeName + ']')).filter(Boolean);
    }
    var attributes = elements.map(function (element) {
      return element.getAttribute(attributeName);
    });
    return attributes;
  }
}
Algolia Insights Index
- Variable Name:
Algolia Insights Index - Custom JavaScript:
1
2
3
function() {
  return {{Algolia Get Data Attributes}}('data-insights-index')[0];
}
If you search multi indices, you need to specify which index to track. You can add an optional query selector that contains data-insights-index attribute.
For example, if you have the following HTML:
1
2
3
4
5
6
7
8
9
10
11
<div id="index-1" data-insights-index="<your-index-name>">
  <div id="hits">
    <!-- ... -->
  </div>
</div>

<div id="index-2">
  <div id="hits">
    <!-- ... -->
  </div>
</div>
You can specify the #index-1 container like this:
1
2
3
function() {
  return {{Algolia Get Data Attributes}}('data-insights-index', '#index-1')[0];
}
This applies to the rest of variables using Algolia Get Data Attributes if you use multi-index search.
Algolia Insights ObjectIDs
- Variable Name:
Algolia Insights ObjectIDs - Custom JavaScript:
1
2
3
function() {
  return {{Algolia Get Data Attributes}}('data-insights-object-id');
}
Algolia Insights Positions
- Variable Name:
Algolia Insights Positions - Custom JavaScript:
1
2
3
function() {
  return {{Algolia Get Data Attributes}}('data-insights-position');
}
Algolia Insights QueryID
- Variable Name:
Algolia Insights QueryID - Custom JavaScript:
1
2
3
function() {
  return {{Algolia Get Data Attributes}}('data-insights-query-id')[0];
}
Algolia Insights Viewed Filters
- Variable Name:
Algolia Insights Viewed Filters - Custom JavaScript:
1
2
3
4
5
6
7
8
function() {
  var attributeName = 'data-insights-filter';
  var elements = Array.from(document.querySelectorAll('[' + attributeName + ']'));
  var attributes = elements.map(function (element) {
    return element.getAttribute(attributeName);
  });
  return attributes;
}
Algolia Insights Clicked Filters
- Variable Name:
Algolia Insights Clicked Filters - Custom JavaScript:
1
2
3
function() {
  return {{Algolia Get Data Attributes}}('data-insights-filter')
}
Triggers
Hits Viewed
As you setup your website to send Hits Viewed event, you need to create a trigger based on the event.
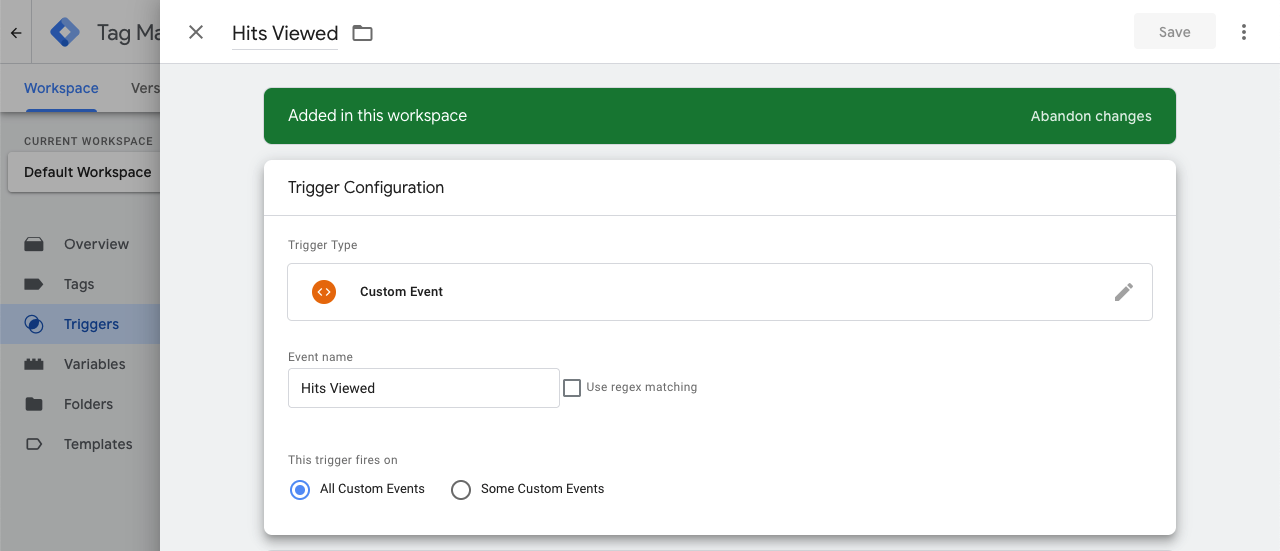
- Trigger Name:
Hits Viewed - Trigger Type:
Custom Event - Event Name:
Hits Viewed
Custom triggers for hits
Click or conversion events normally come from user actions, which are usually click events on DOM elements. For example, you have this template:
1
2
3
4
5
6
7
8
9
10
11
12
13
14
15
16
17
18
<div data-insights-index="<your-index-name>">
  <div id="hits">
    <article
      class="hit"
      data-insights-object-id="{{objectID}}"
      data-insights-position="{{__position}}"
      data-insights-query-id="{{__queryID}}"
    >
      <h1>{{name}}</h1>
      <p>{{description}}</p>

      <button class="btn-view-details" type="button">
        View Details
      </button>
    </article>
    <!-- ... -->
  </div>
</div>
You can configure the click of the “View Details” button as a trigger on GTM.
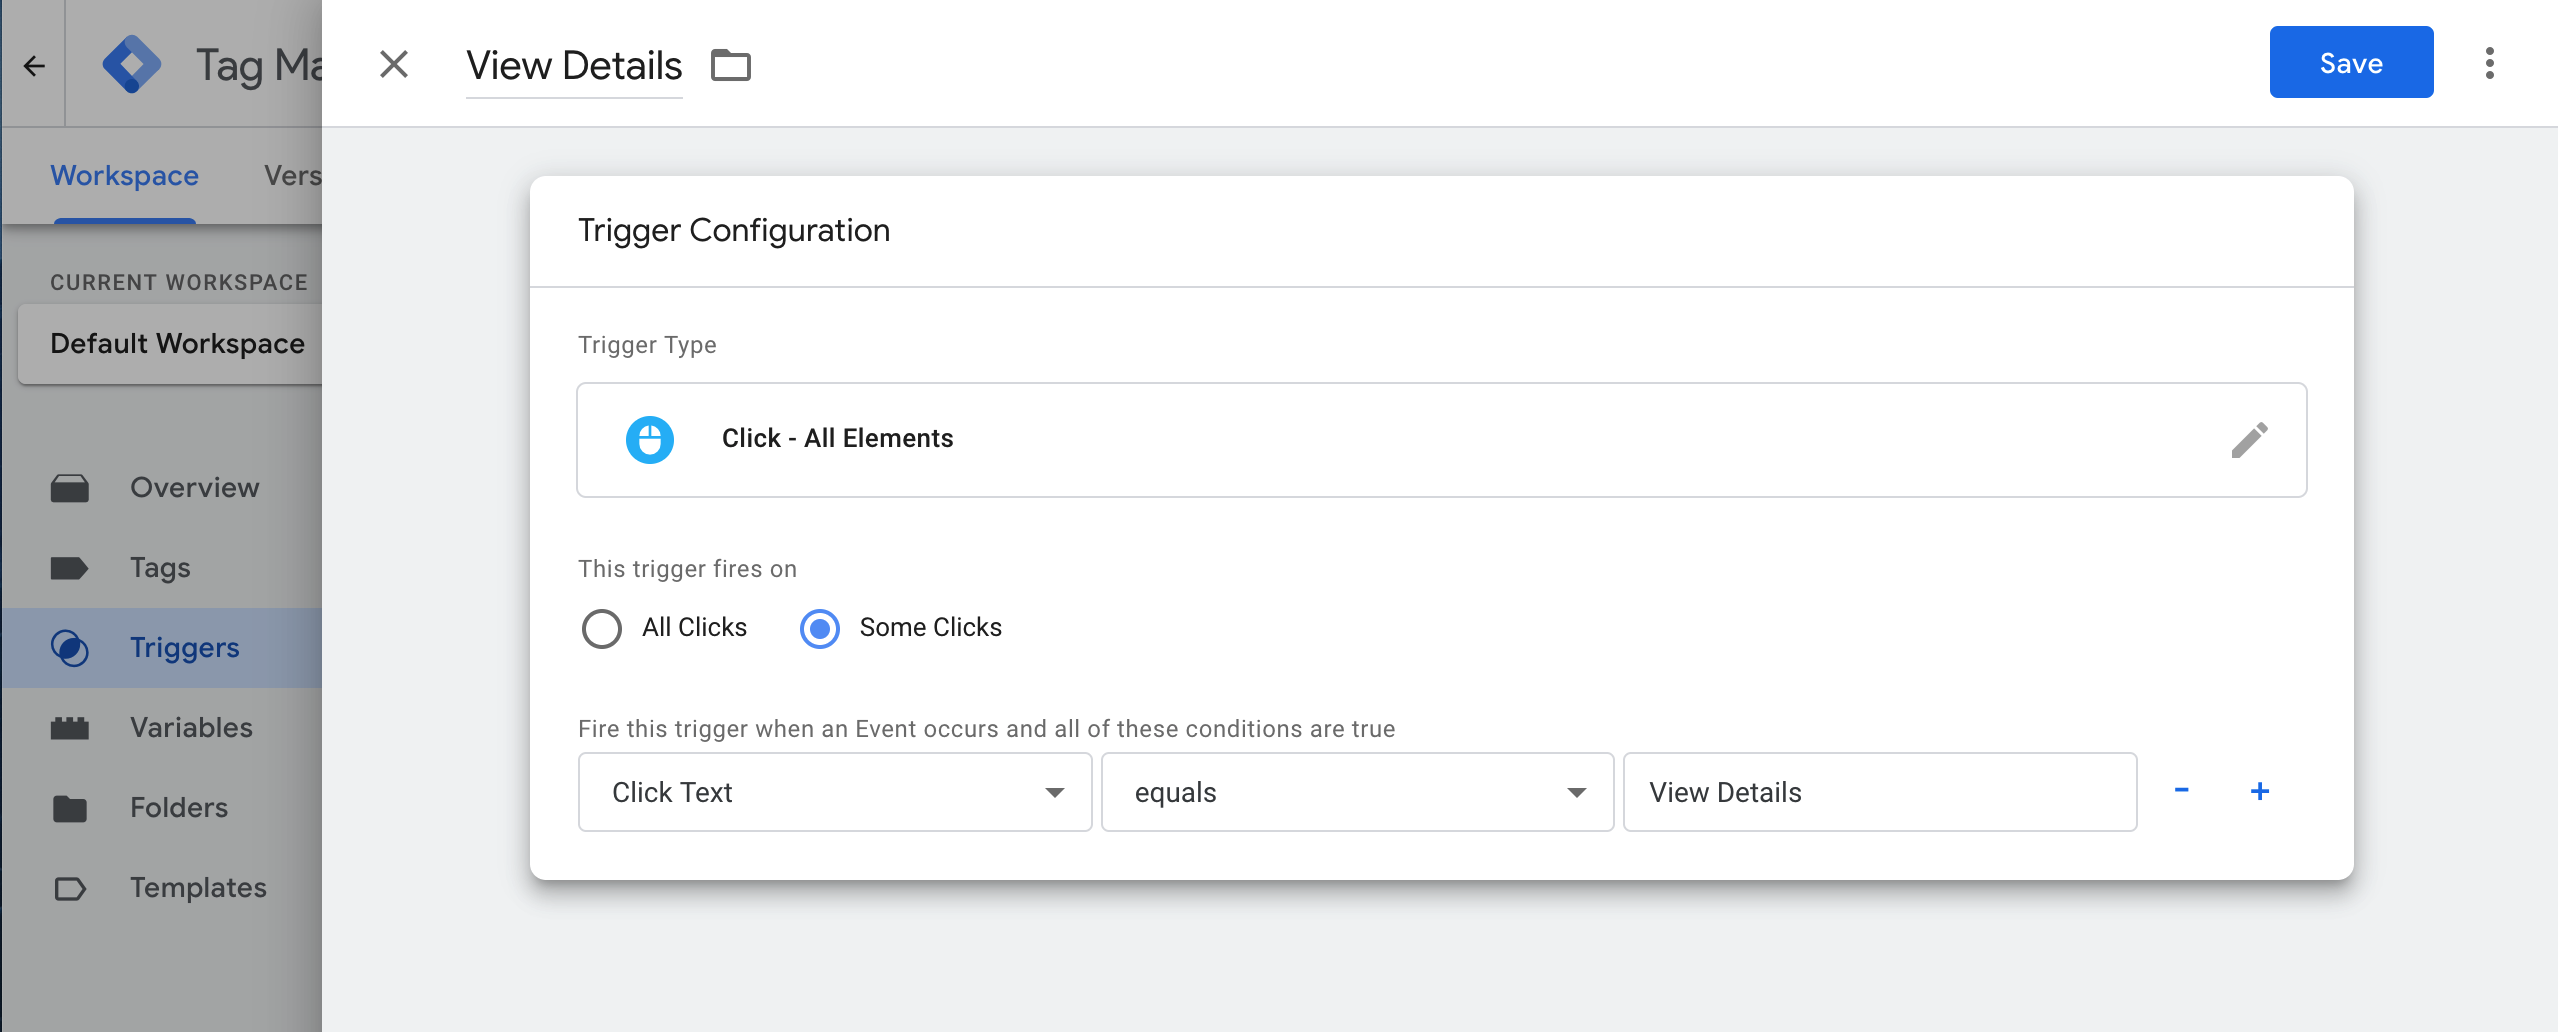
You can also put a condition to match CSS selector:
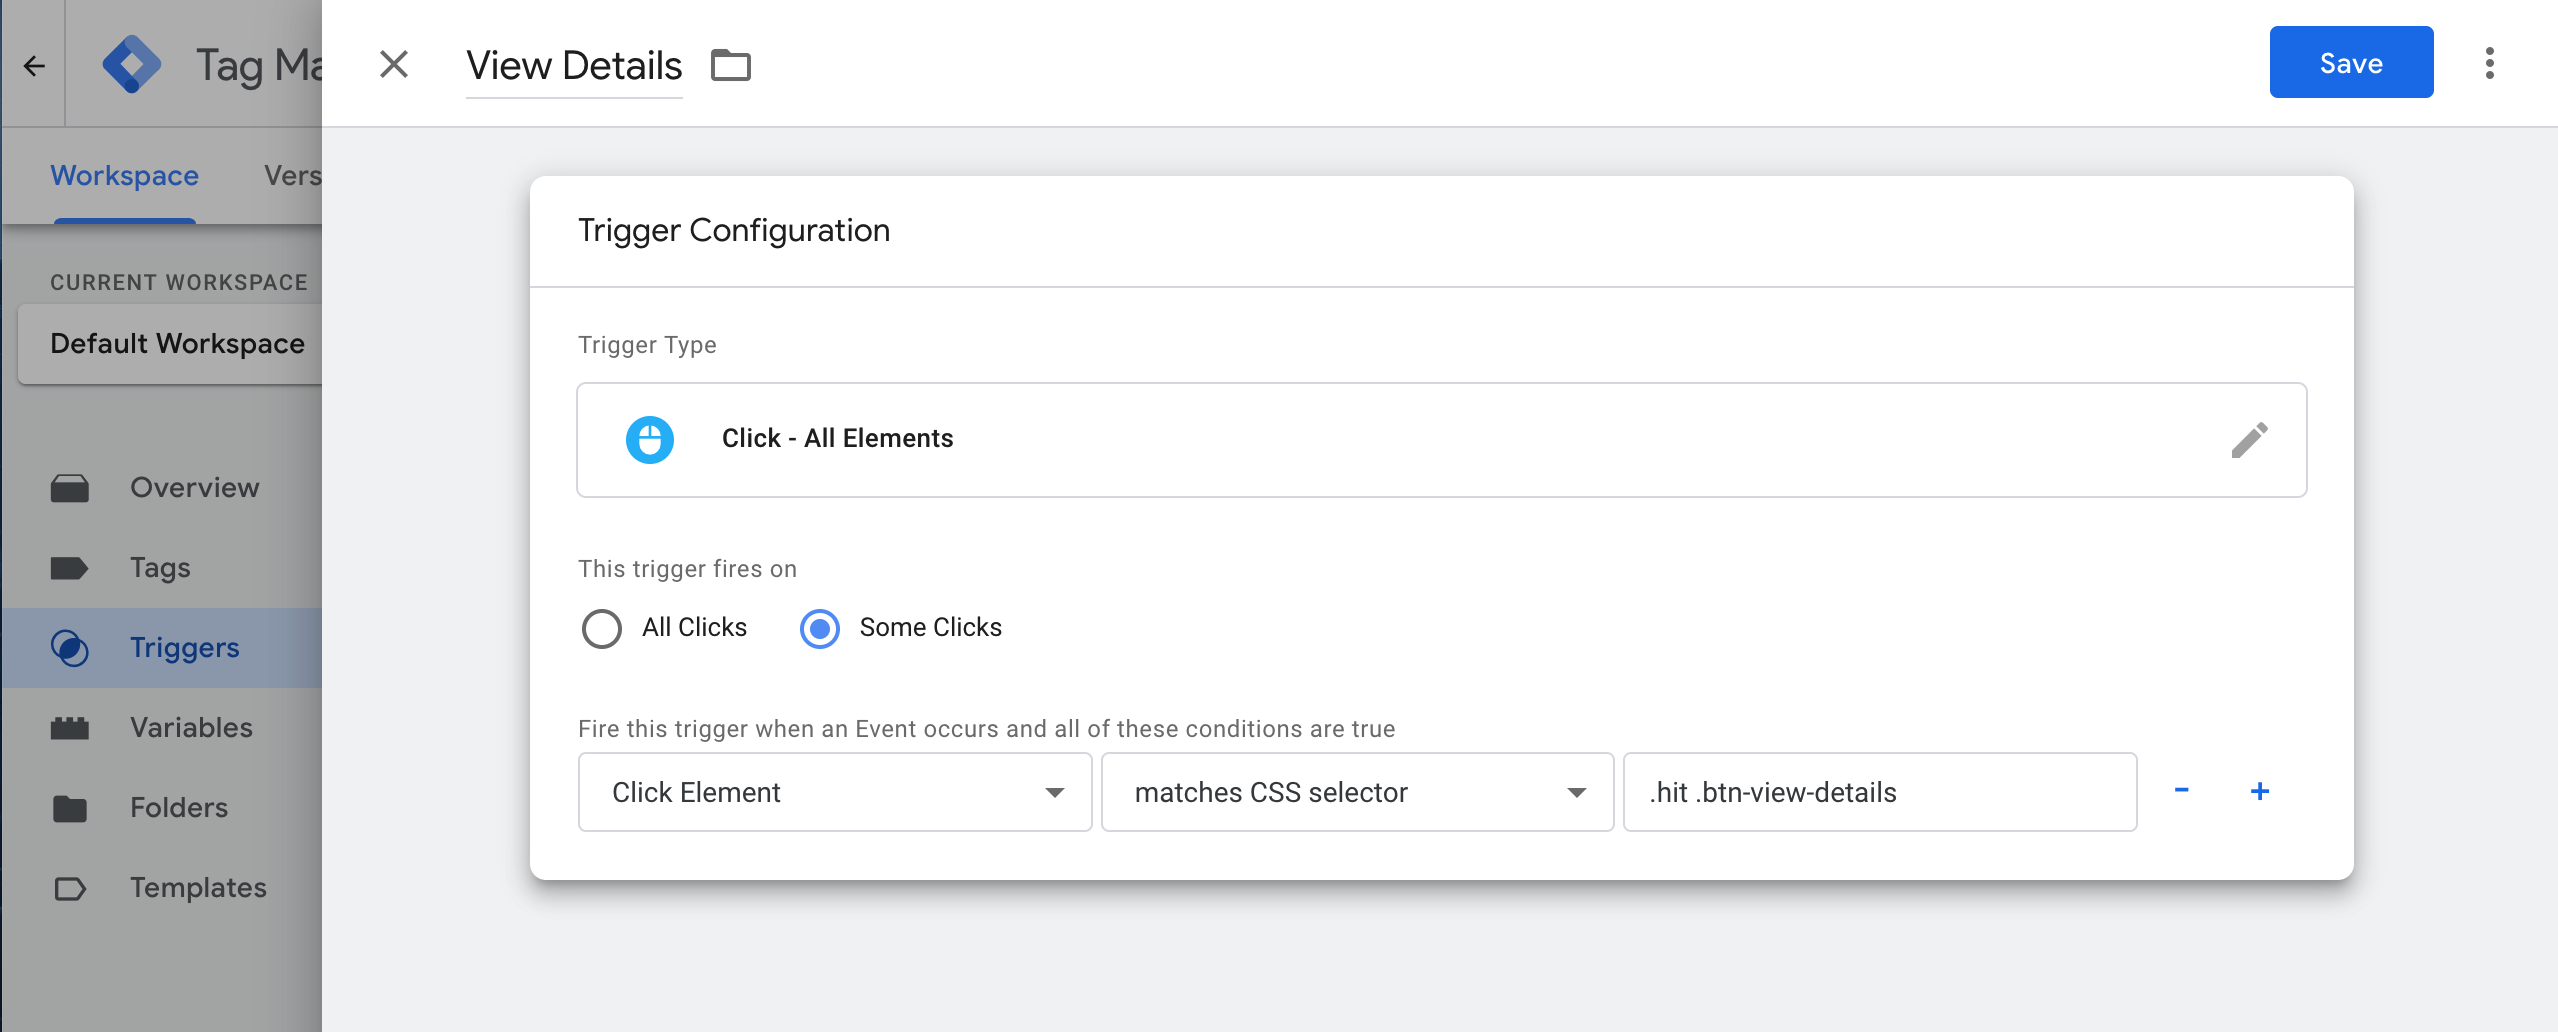
Create triggers to meet your needs. They’re used in the next section. In this guide, a trigger named “View Details” will be used.
Custom triggers for filters
If you want to track clicked filters, you can create a trigger that matches CSS selector of your filter elements.
1
2
3
4
5
6
7
8
9
10
11
12
13
14
15
16
17
<div class="ais-RefinementList">
  <ul class="ais-RefinementList-list">
    <li class="ais-RefinementList-item">
      <div>
        <label data-insights-filter="brand:Apple">
          <input type="checkbox" value="Apple" />
          <span class="ais-RefinementList-labelText">Apple</span>
          <span class="ais-RefinementList-count">746</span>
        </label>
      </div>
    </li>
    <li class="ais-RefinementList-item">
      <!-- ... -->
    </li>
    <!-- ... -->
  </ul>
</div>
In this example, the CSS selector can be .ais-RefinementList-labelText. The attribute data-insights-filter needs to be set on the element matching the CSS selector, or at a higher level in the DOM.
Tags
Tags should specify which Insights method to call when triggered. Each Insights method is represented by a tag in GTM.
Setup your initialization tag (mandatory)
This step is mandatory for initializing the connection with the Insights API. You need to create a new tag in the Tags section of your workspace and select Algolia Search Insights.
In the Init Options, type your App ID and API key with search permissions in the input boxes.
You want to trigger this tag on all pages, hence in the Triggering section below, you need to select “Initialization - All Pages” as the triggering option.

Setup your view tags
Viewed Object IDs
This method refers to viewed-object-ids from the Insights API which sends a view event to capture rendered items.

- Trigger:
Hits Viewed(which was created earlier) - Tag Type:
Algolia Search Insights - Tag Method:
Viewed Object IDs - Event Name: (You can name it as you want)
Viewed Filters
This method refers to viewed-filters from the Insights API which sends a view event to capture rendered filters.
- Trigger:
Hits Viewed(which was created earlier) - Tag Type:
Algolia Search Insights - Tag Method:
Viewed Filters - Filters:
{{Algolia Insights Viewed Filters}}(which was created earlier) - Event Name: (You can name it as you want)
Setup your click tags
Clicked Object IDs After Search
This method refers to clicked-object-ids-after-search from the Insights API which sends a click event to capture a query and its clicked items and positions.
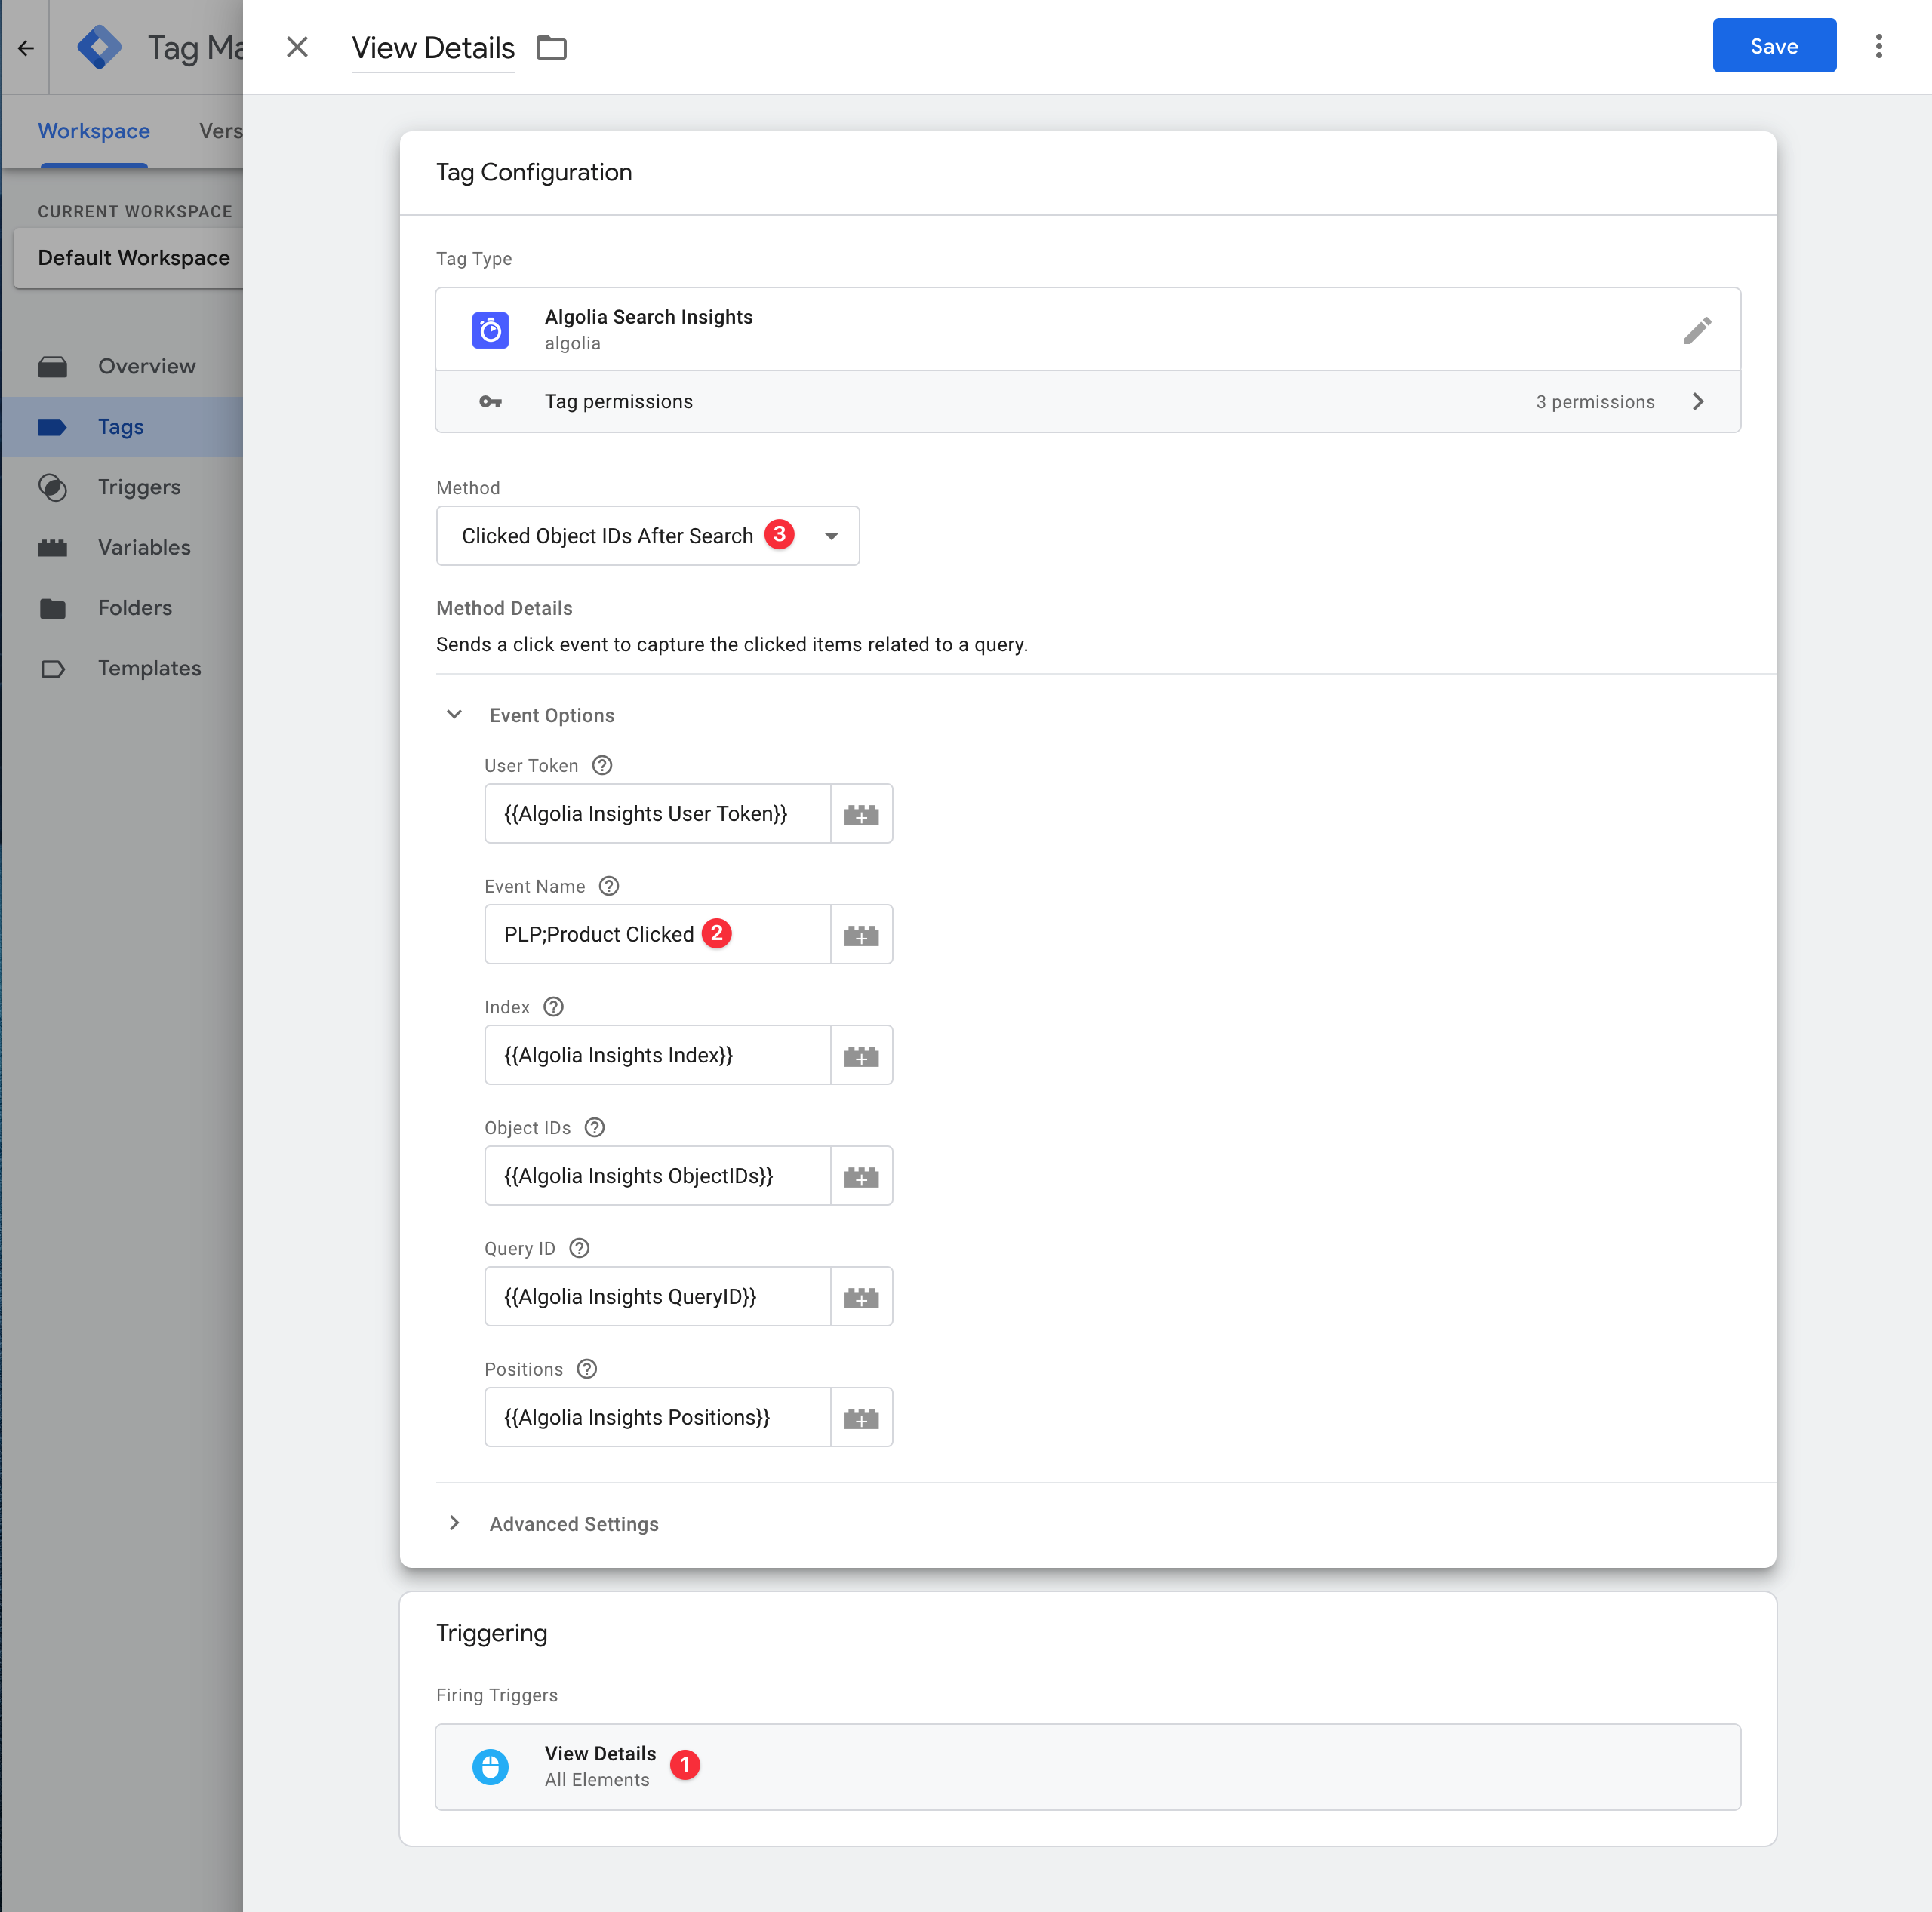
- Trigger:
View Details(which was created earlier) - Tag Type:
Algolia Search Insights - Tag Method:
Clicked Object IDs After Search
Clicked Object IDs
This method refers to clicked-object-ids from the Insights API which sends a click event to capture clicked items and positions regardless of the query associated with it. It’s useful, for example, in product detail pages, or in the cart page.
Clicked Filters
This method refers to clicked-filters from the Insights API which sends a click event to capture clicked filter. You can pass {{Algolia Insights Clicked Filters}} to the method.
Setup your conversion tags
Converted Object IDs after search
This method refers to converted-object-ids-after-search from the Insights API which sends a conversion event to capture a query and its clicked items. You can setup this tag just like you setup tags for click.
Converted Object IDs
This method refers to converted-object-ids from the Insights API which sends a conversion event to capture its clicked items regardless of the query associated with it.
Converted Filters
This method refers to converted-filters from the Insights API which sends a conversion event to capture converted filter. You can pass {{Algolia Insights Clicked Filters}} to the method.
Submit your changes and debug your events
Once you’ve set up the different variables, tags, and triggers, you can submit your changes. To ensure you’re sending events to the Insights API, you can use the Tag Assistant from Google.
This allows you to check that the expected Algolia variables are all set:
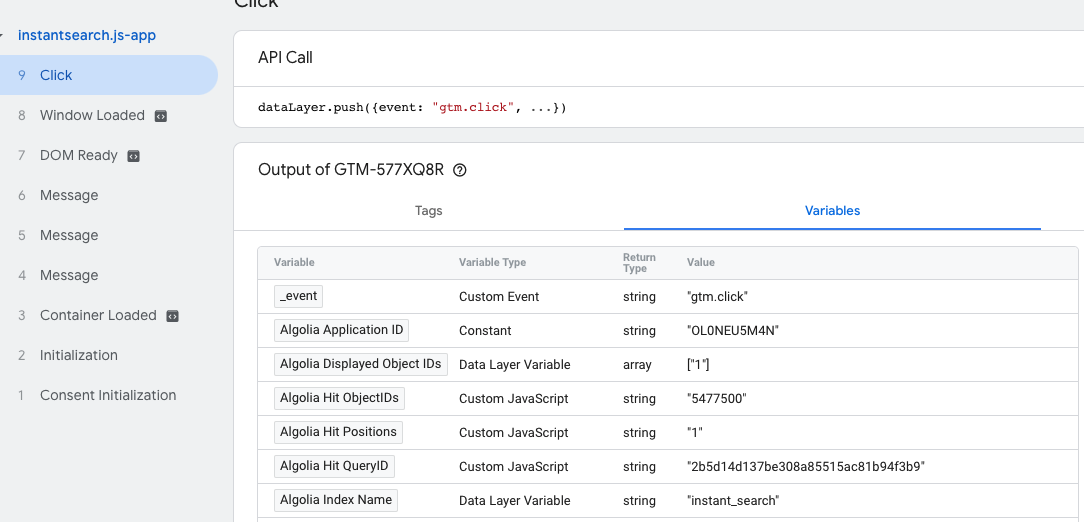
Now the next step is to validate your events:

