Getting Started with Vue InstantSearch
On this page
Welcome to Vue InstantSearch
Vue InstantSearch is a Vue.js library that lets you create an instant search results experience using Algolia’s search API.
To get started, you’ll build a search UI for an ecommerce website. You’ll learn how to:
- Display and format the search bar and results
- Use pre-built UI components (widgets) to filter results
Your goal is to create a fully working Vue InstantSearch app as fast as possible. This guide provides you with the data, installation instructions, all necessary code, and a step-by-step process. The guide doesn’t explain how everything is wired together yet, but you can dig into the library immediately after.
Live demo
Here’s what you’ll build in a couple of minutes:
If you haven’t done so yet, take a look at the interactive getting started tutorial. It should take about 2 minutes to complete.
Build a simple UI
Bootstrap your application
To bootstrap a working Vue InstantSearch app in seconds, use an app installed with Vue InstantSearch.
Open a terminal and paste these lines:
1
npx @vue/cli create ais-ecommerce-demo-app
This generates a folder on your machine that looks like this:
1
2
3
4
5
6
7
8
ais-ecommerce-demo-app/
├── node_modules/
├── src/
├──── App.vue
├──── main.js
├── package.json
├── README.md
└── yarn.lock
Your application uses predefined credentials (application ID, API key and index name), provided on this page.
Vue InstantSearch can be installed via an npm package in your already existing Vue application. This is covered in detail in the installation guide.
Initialization
If you’re not using the repository for this demo, but instead initialize your app with Vue command-line tool, you can install Vue InstantSearch like this:
1
npm install vue-instantsearch algoliasearch instantsearch.css
Change the contents of main.js to include the Vue InstantSearch library:
1
2
3
4
5
6
7
8
9
10
import Vue from 'vue';
import App from './App.vue';
import InstantSearch from 'vue-instantsearch';

Vue.use(InstantSearch);

new Vue({
  el: '#app',
  render: (h) => h(App),
});
Add the search UI code
Then, open the src/App.vue component, replace the whole file, with the following:
1
2
3
4
5
6
7
8
9
10
11
12
13
14
15
16
17
18
19
20
21
22
23
24
25
26
27
28
29
30
31
32
33
<template>
  <ais-instant-search :search-client="searchClient" index-name="demo_ecommerce">
    <ais-search-box />
    <ais-hits>
      <template v-slot:item="{ item }">
        <h2>{{ item.name }}</h2>
      </template>
    </ais-hits>
  </ais-instant-search>
</template>

<script>
import algoliasearch from 'algoliasearch/lite';
import 'instantsearch.css/themes/satellite-min.css';

export default {
  data() {
    return {
      searchClient: algoliasearch(
        'B1G2GM9NG0',
        'aadef574be1f9252bb48d4ea09b5cfe5'
      ),
    };
  },
};
</script>

<style>
body {
  font-family: sans-serif;
  padding: 1em;
}
</style>
You need to provide an Algolia search client to the ais-instant-search. It has to be created as part of the data, so that it can be passed to the template.
Run your project
Now that you bootstrapped the project and added the search UI code, do a first run. Inside your terminal, type:
1
2
cd ais-ecommerce-demo-app
npm start
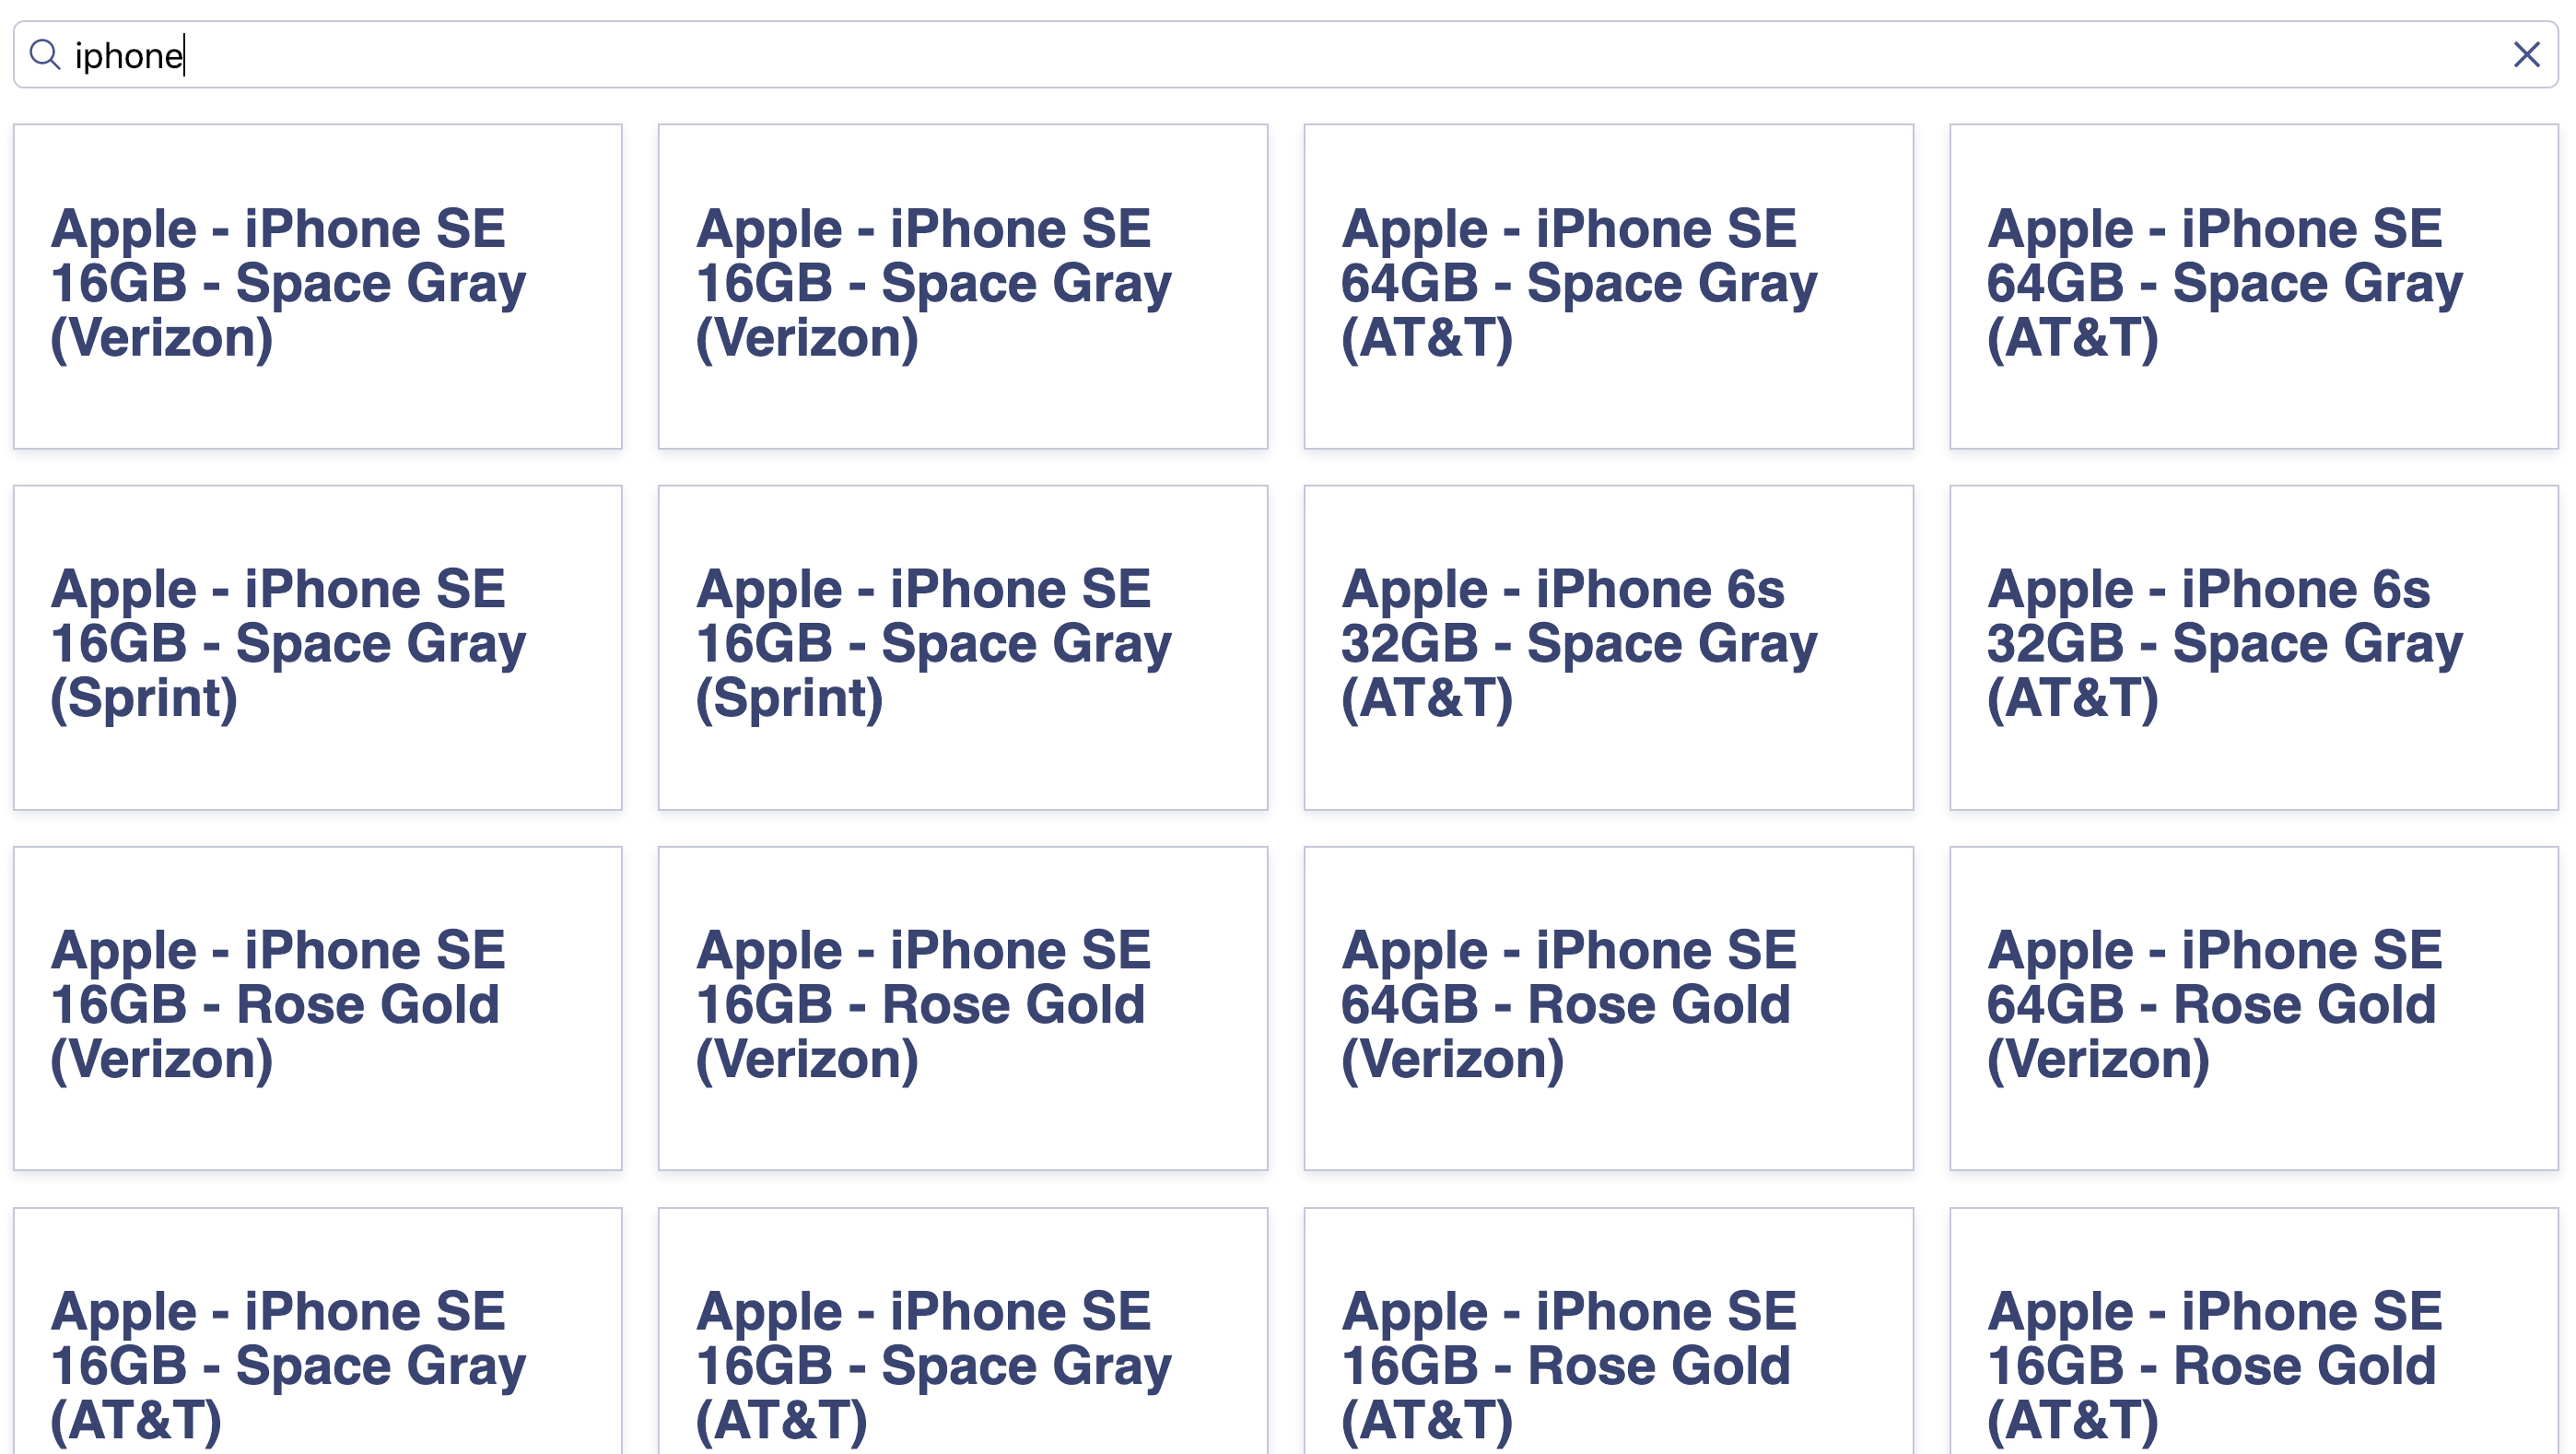
Then open your browser and navigate to http://localhost:3000.
You’ll see this:
Dig in and understand the code
When you read the code of the file src/App.js, you will see three InstantSearch widgets:
ais-instant-search- is the root Vue InstantSearch component. All other widgets need to be wrapped by this one for them to function.ais-search-box- displays a nice looking Search Box for users to type queries in it.ais-hits- displays the results from Algolia, based on the query.
There are a lot more widgets, you can discover them all in the widget showcase.
Additionally, you can see that widgets have a predefined style. Read more about this in the styling guide).
Add more widgets
To make your search UI more efficient and practical for your users, add some more widgets:
- A way to filter results by brands
- A way to clear active filters
- A way to configure default search parameters
- Pagination.
Open the file src/App.vue and update its content with:
1
2
3
4
5
6
7
8
9
10
11
12
13
14
15
16
17
18
19
<template>
  <ais-instant-search index-name="demo_ecommerce" :search-client="searchClient">
    <div class="left-panel">
      <ais-clear-refinements />
      <h2>Brands</h2>
      <ais-refinement-list attribute="brand" searchable />
      <ais-configure :hitsPerPage="8" />
    </div>
    <div class="right-panel">
      <ais-search-box />
      <ais-hits>
        <template v-slot:item="{ item }">
          <h2>{{ item.name }}</h2>
        </template>
      </ais-hits>
      <ais-pagination />
    </div>
  </ais-instant-search>
</template>
Here are the new widgets you added:
ais-clear-refinements- displays a button to clear the current refinementsais-refinement-list- displays a list of brands to filter your searchais-configure- allows you to pass search parameters, here to set the number of hits to display per pageais-pagination- implements paging logic
This example uses ais-configure to set the number of hitsPerPage to 8, but this widget can be used for any other search parameters such as filters, analytics, etc.
The ais-configure widget is renderless, it doesn’t output anything to the DOM.
To create the two column layout, replace the content of the style tag with:
1
2
3
4
5
6
7
8
9
10
11
12
13
14
15
body {
  font-family: sans-serif;
  padding: 1em;
}

.ais-Hits-list {
  margin-top: 0;
  margin-bottom: 1em;
}

.ais-InstantSearch {
  display: grid;
  grid-template-columns: 1fr 4fr;
  grid-gap: 1em;
}
Go to your browser, and you’ll see this:
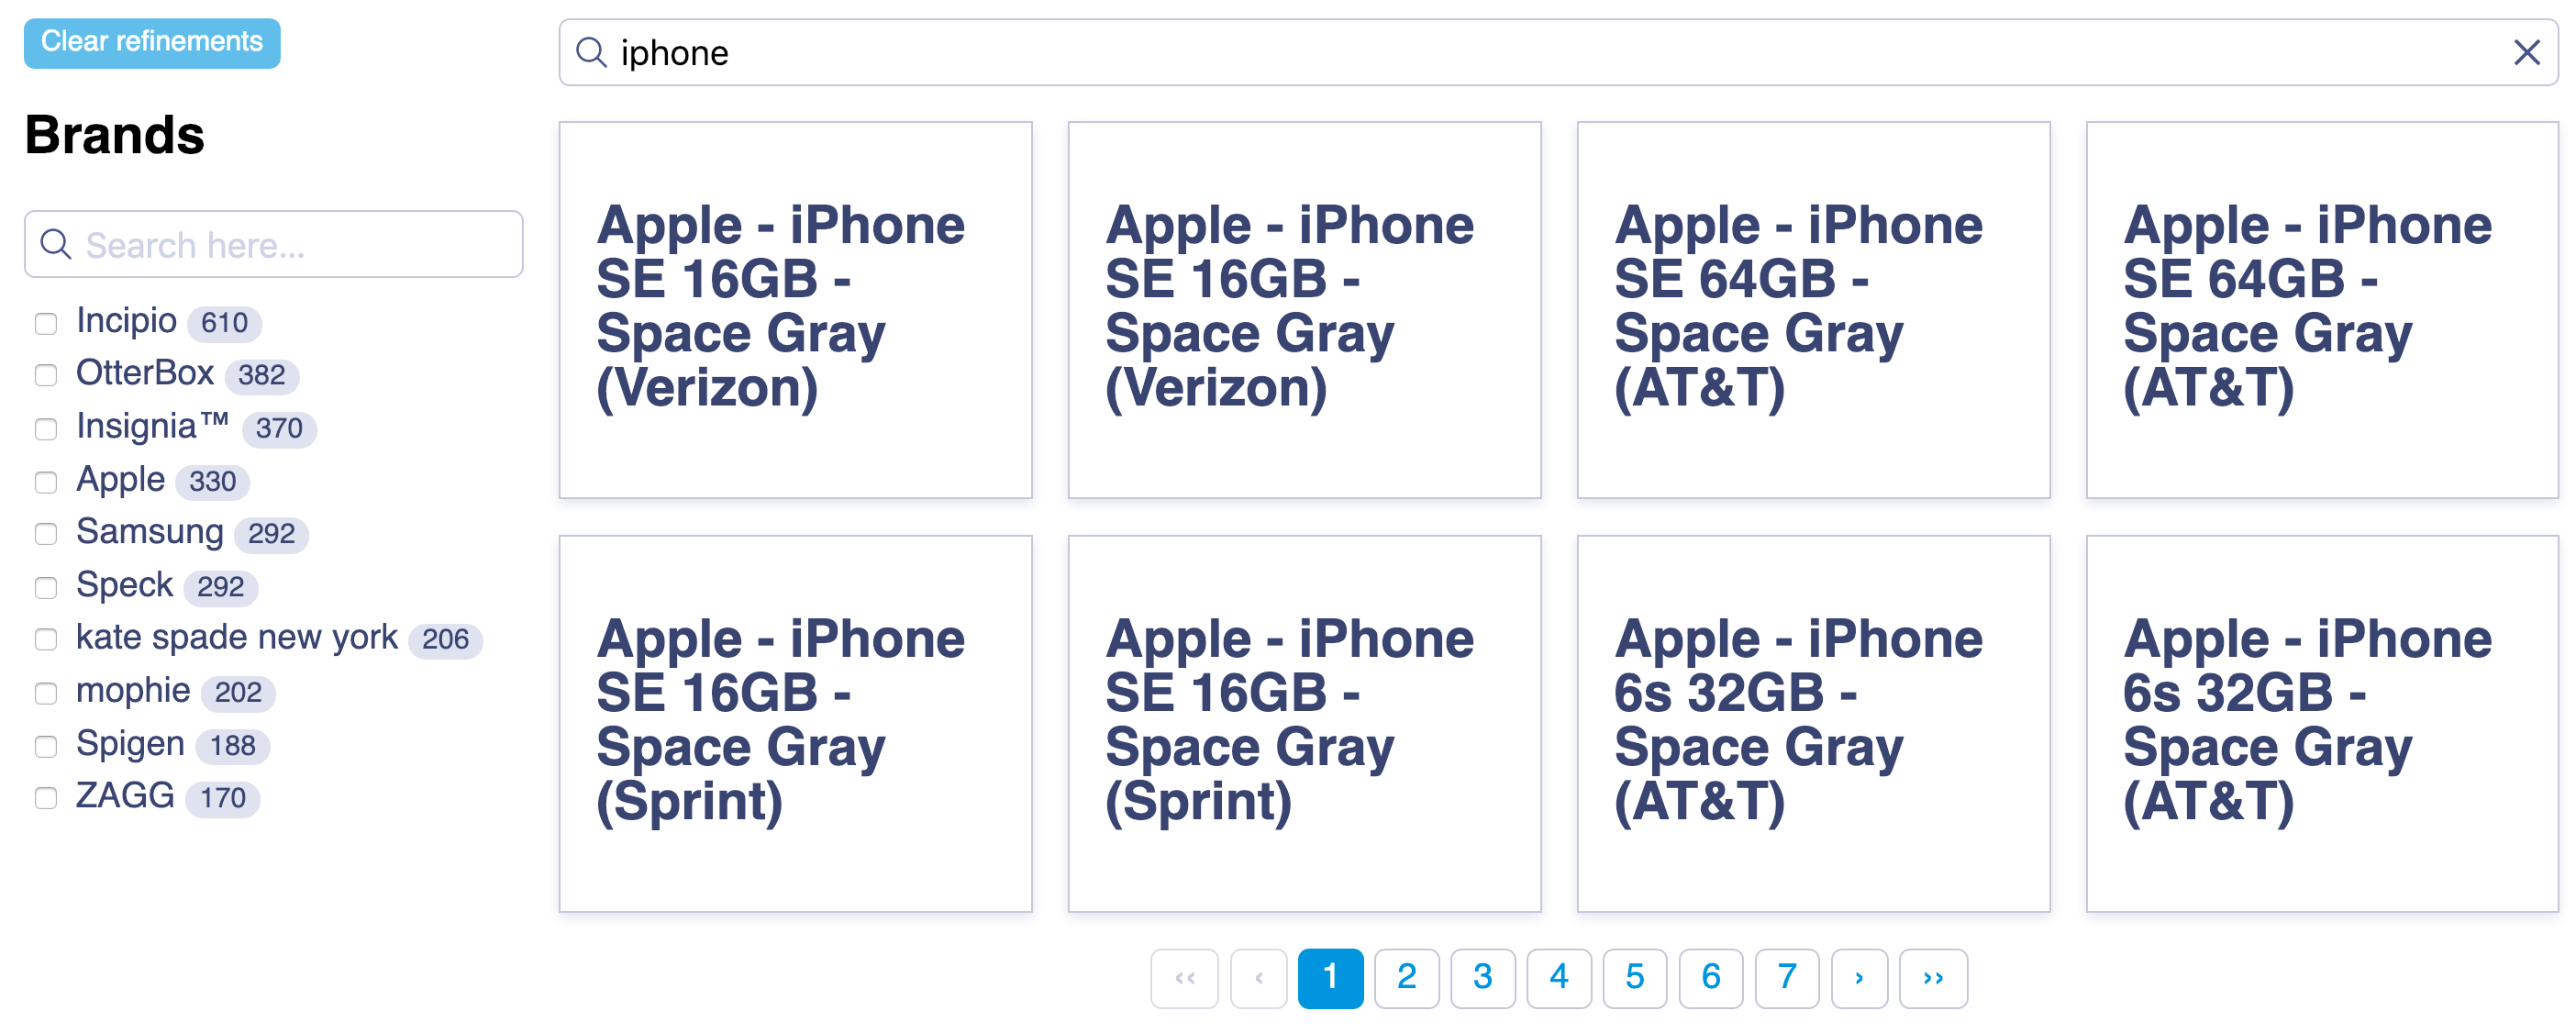
You just added a bunch of widgets to your first instant-search page.
Customize hits and add some final touches
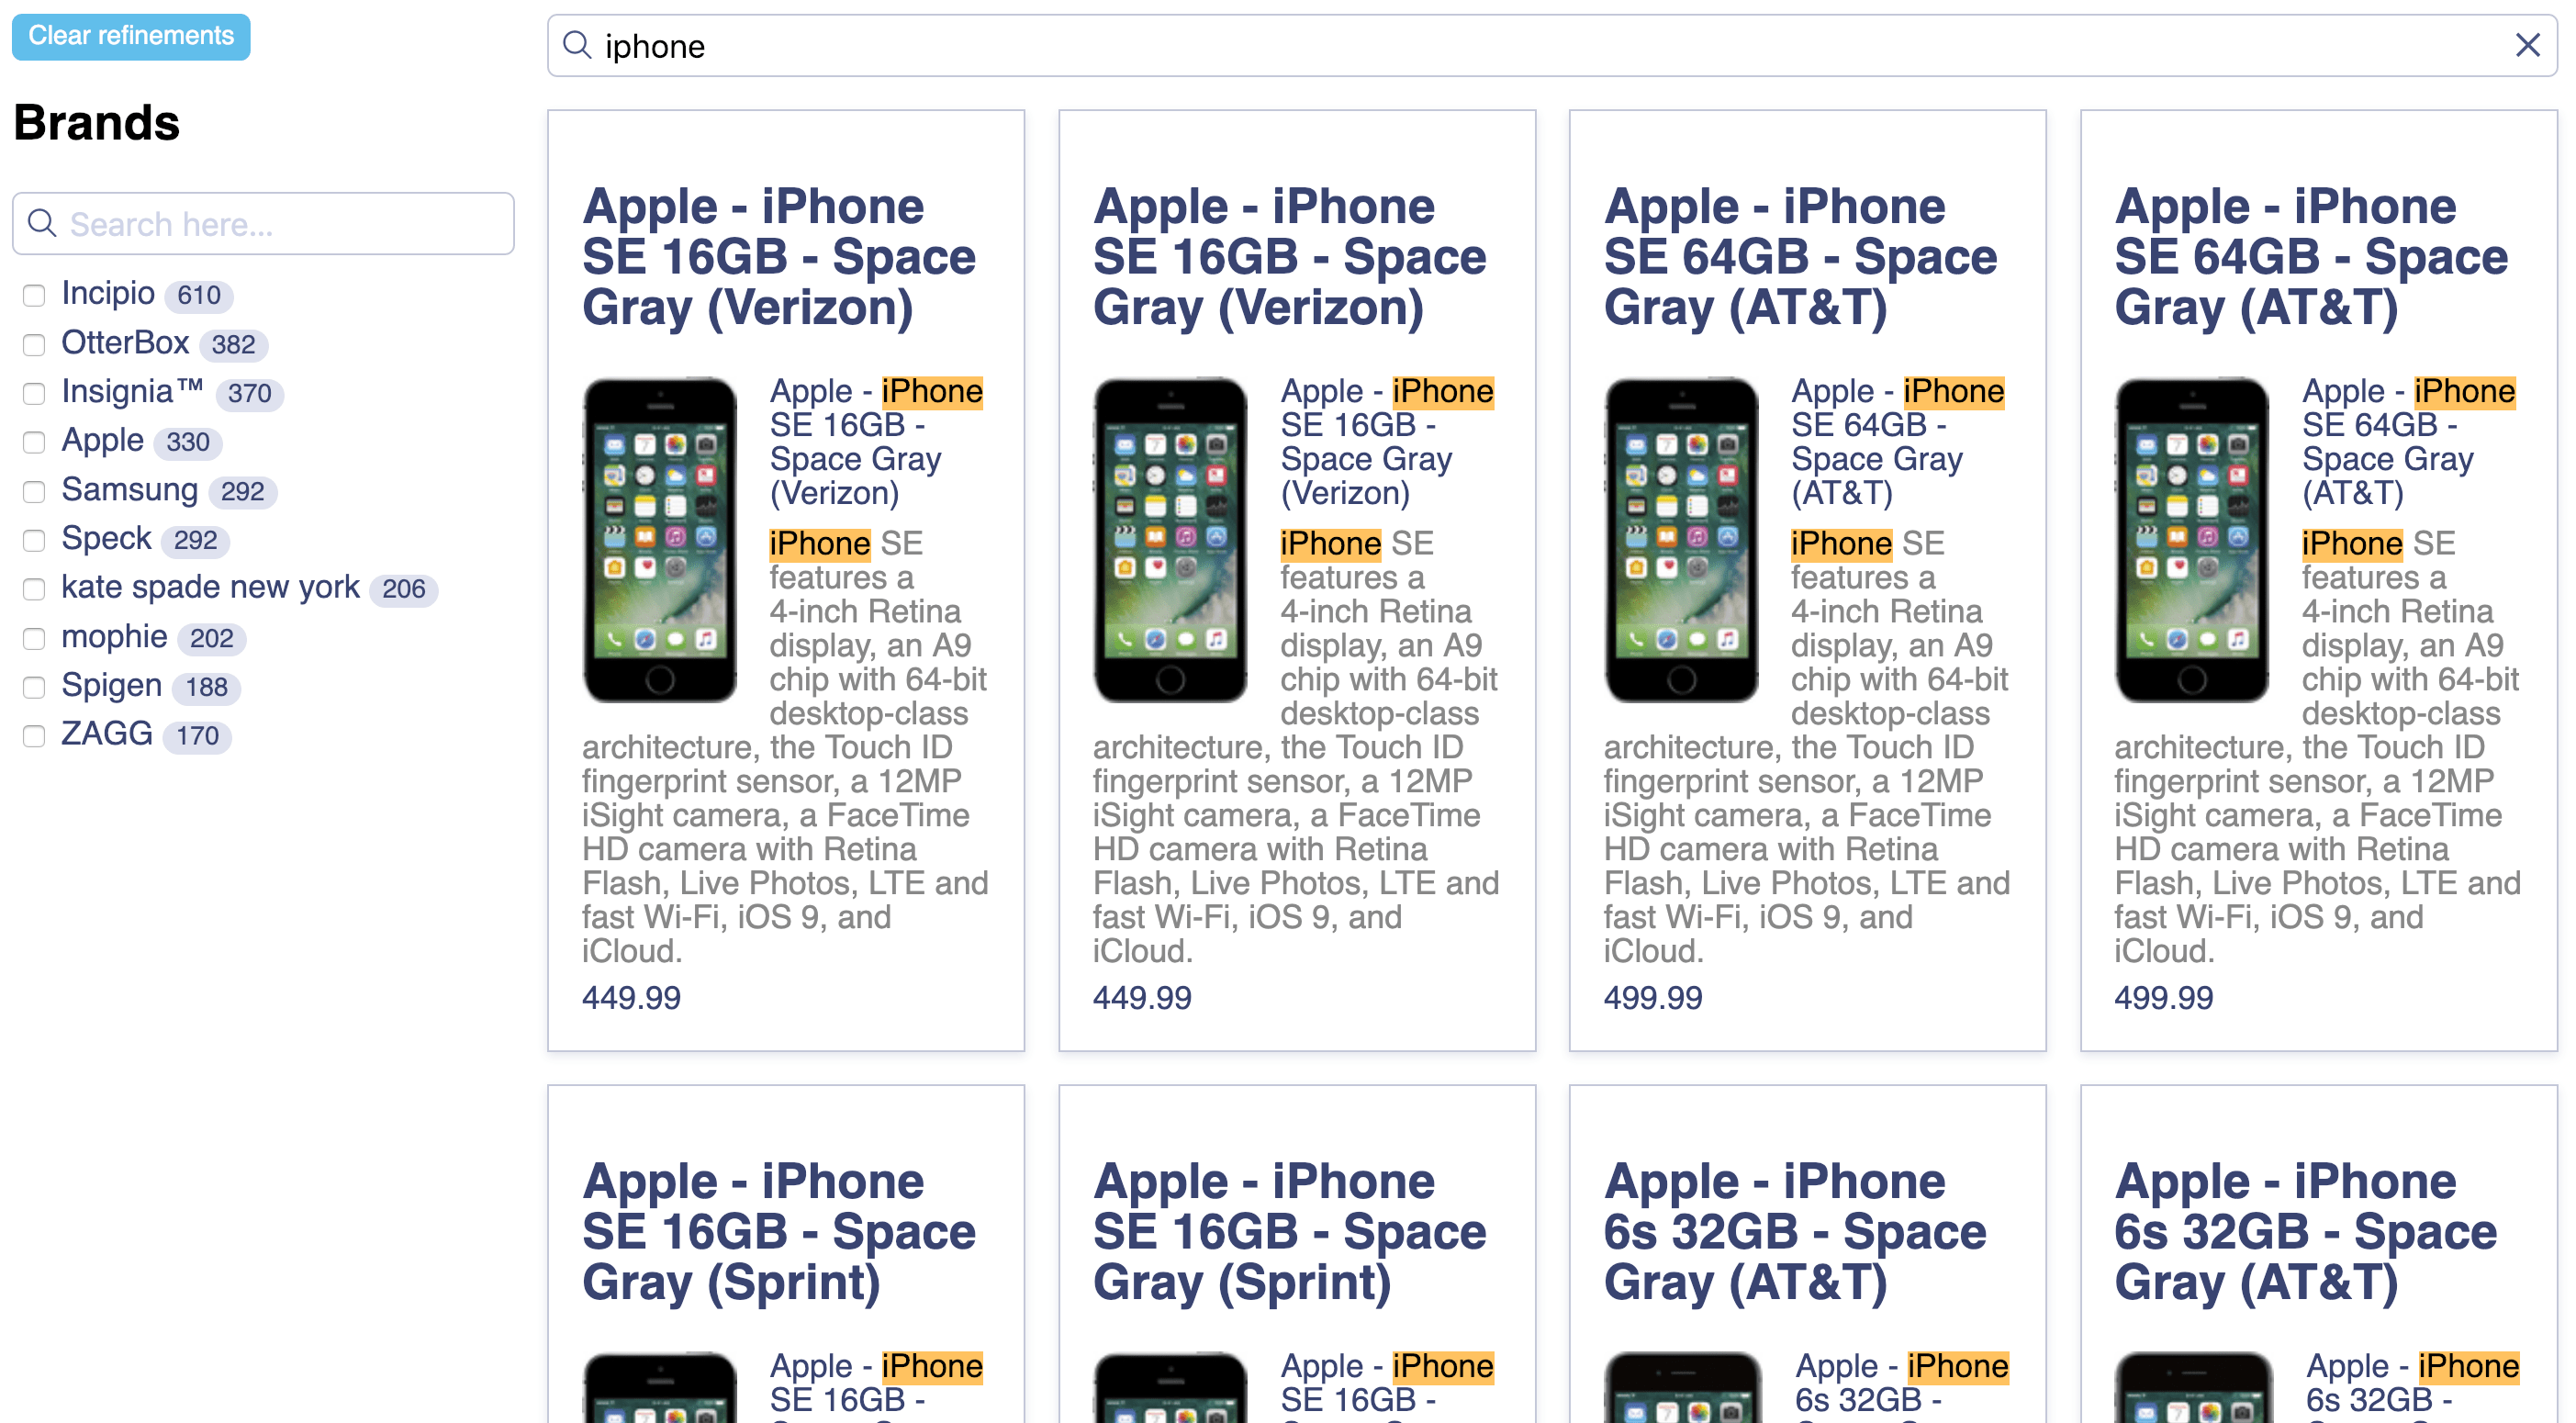
The search UI is almost complete as a simple demo. The last step is to customize the rendering of the hits to display more information than just the name of the products.
Add more information
Open the file src/App.vue and replace the content of the ais-hits item slot with:
1
2
3
4
5
6
7
8
9
10
11
<template v-slot:item="{ item }">
  <h2>{{ item.name }}</h2>
  <img :src="item.image" align="left" :alt="item.name" />
  <div class="hit-name">
    <ais-highlight attribute="name" :hit="item"></ais-highlight>
  </div>
  <div class="hit-description">
    <ais-highlight attribute="description" :hit="item"></ais-highlight>
  </div>
  <div class="hit-price">{{ item.price }}</div>
</template>
Add formatting
For the final touches, update the content of the style tag with:
1
2
3
4
5
6
7
8
9
10
11
12
13
14
15
16
17
18
19
20
21
22
23
24
25
26
27
body {
  font-family: sans-serif;
  padding: 1em;
}

.ais-Hits-list {
  margin-top: 0;
  margin-bottom: 1em;
}

.ais-InstantSearch {
  display: grid;
  grid-template-columns: 1fr 4fr;
  grid-gap: 1em;
}

.ais-Hits-item img {
  margin-right: 1em;
}
.hit-name {
  margin-bottom: 0.5em;
}
.hit-description {
  color: #888;
  font-size: 0.8em;
  margin-bottom: 0.5em;
}
Now open your browser, you’ll see this:
Summary
You just learned how to customize the rendering of the Hits widget. Learn more about customization in the customization guide.
Learn how to configure the dataset
Then you can configure the index using the following code:
1
2
3
4
5
6
7
8
9
10
11
12
// composer autoload
require __DIR__ . '/vendor/autoload.php';

// if you are not using composer
// require_once 'path/to/algoliasearch.php';

$client = \Algolia\AlgoliaSearch\SearchClient::create(
  'YourApplicationID',
  'YourAdminAPIKey'
);

$index = $client->initIndex('your_index_name');
1
2
3
4
5
6
7
8
9
10
11
12
13
14
15
16
17
$index->setSettings(array(
  "searchableAttributes" => [
    "brand",
    "name",
    "categories",
    "unordered(description)"
  ],
  "customRanking" => [
    "desc(popularity)"
  ],
  "attributesForFaceting" => [
    "searchable(brand)",
    "type",
    "categories",
    "price"
  ]
));

