Merchandise Products on Category Pages
On this page
Category pages offer great opportunities for merchandising with Rules. Rules are a way to tweak your relevance for specific items based on some conditions. For example, you can set up a Rule to promote a time-limited Sale for specific products.
Should you use the Visual Editor or the Manual Editor?
You can use both the Visual Editor and the Manual Editor in the dashboard.
The Visual Editor has a configurable preview that lets you test the effect of your Rules on your index before you activate a Rule in production. On the other hand, the Manual Editor supports more advanced ways to set up Rules. The following table provides an overview of their capabilities to help you decide when you should use which.
| Editor | When to use |
|---|---|
| Visual Editor |
|
| Manual Editor |
|
Merchandising categories with the Visual Editor
To merchandise categories with the Visual Editor, follow these steps:
- Go to the Rules section of the Algolia dashboard.
- Select the index to which you want to add Rules.
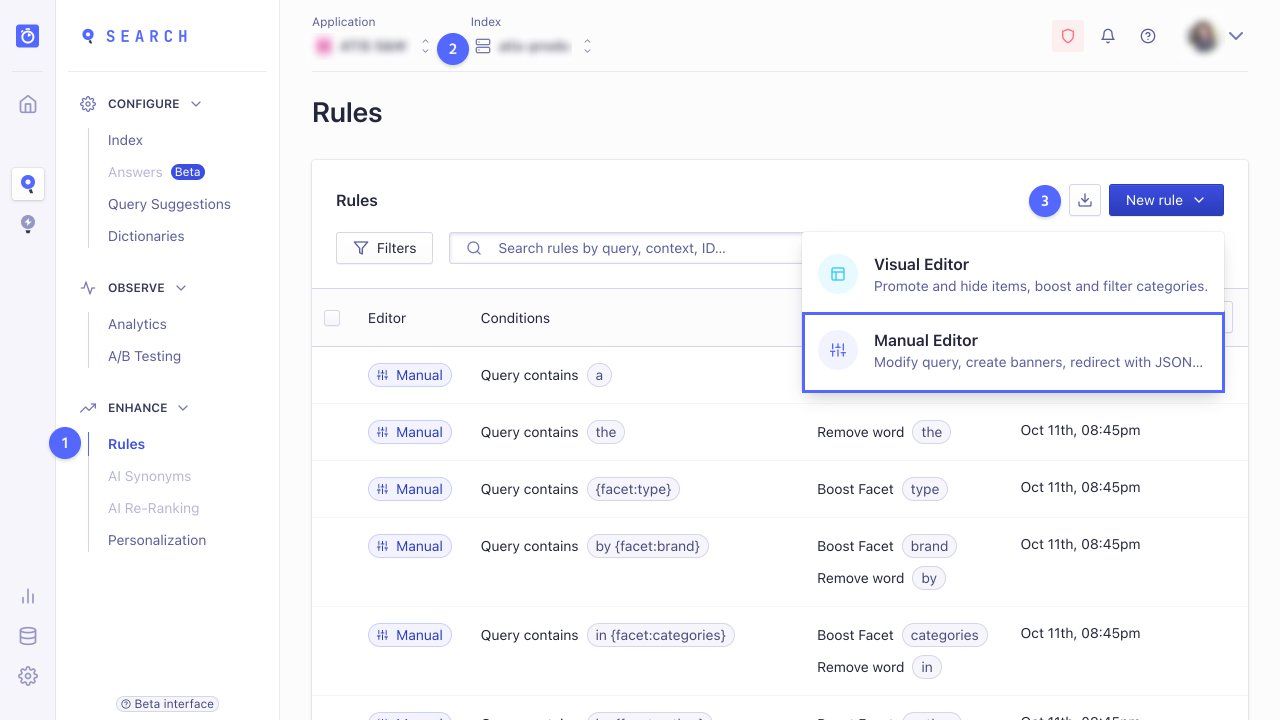
-
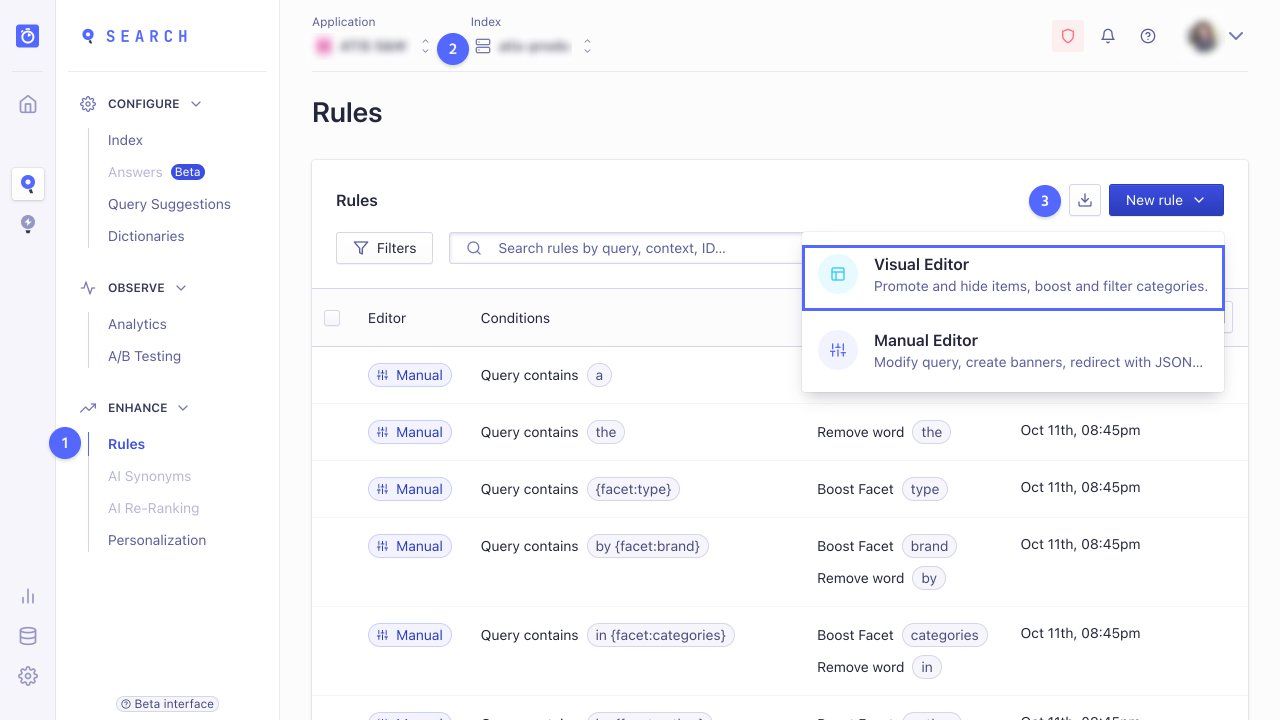
Click New Rule and select Visual Editor.
-
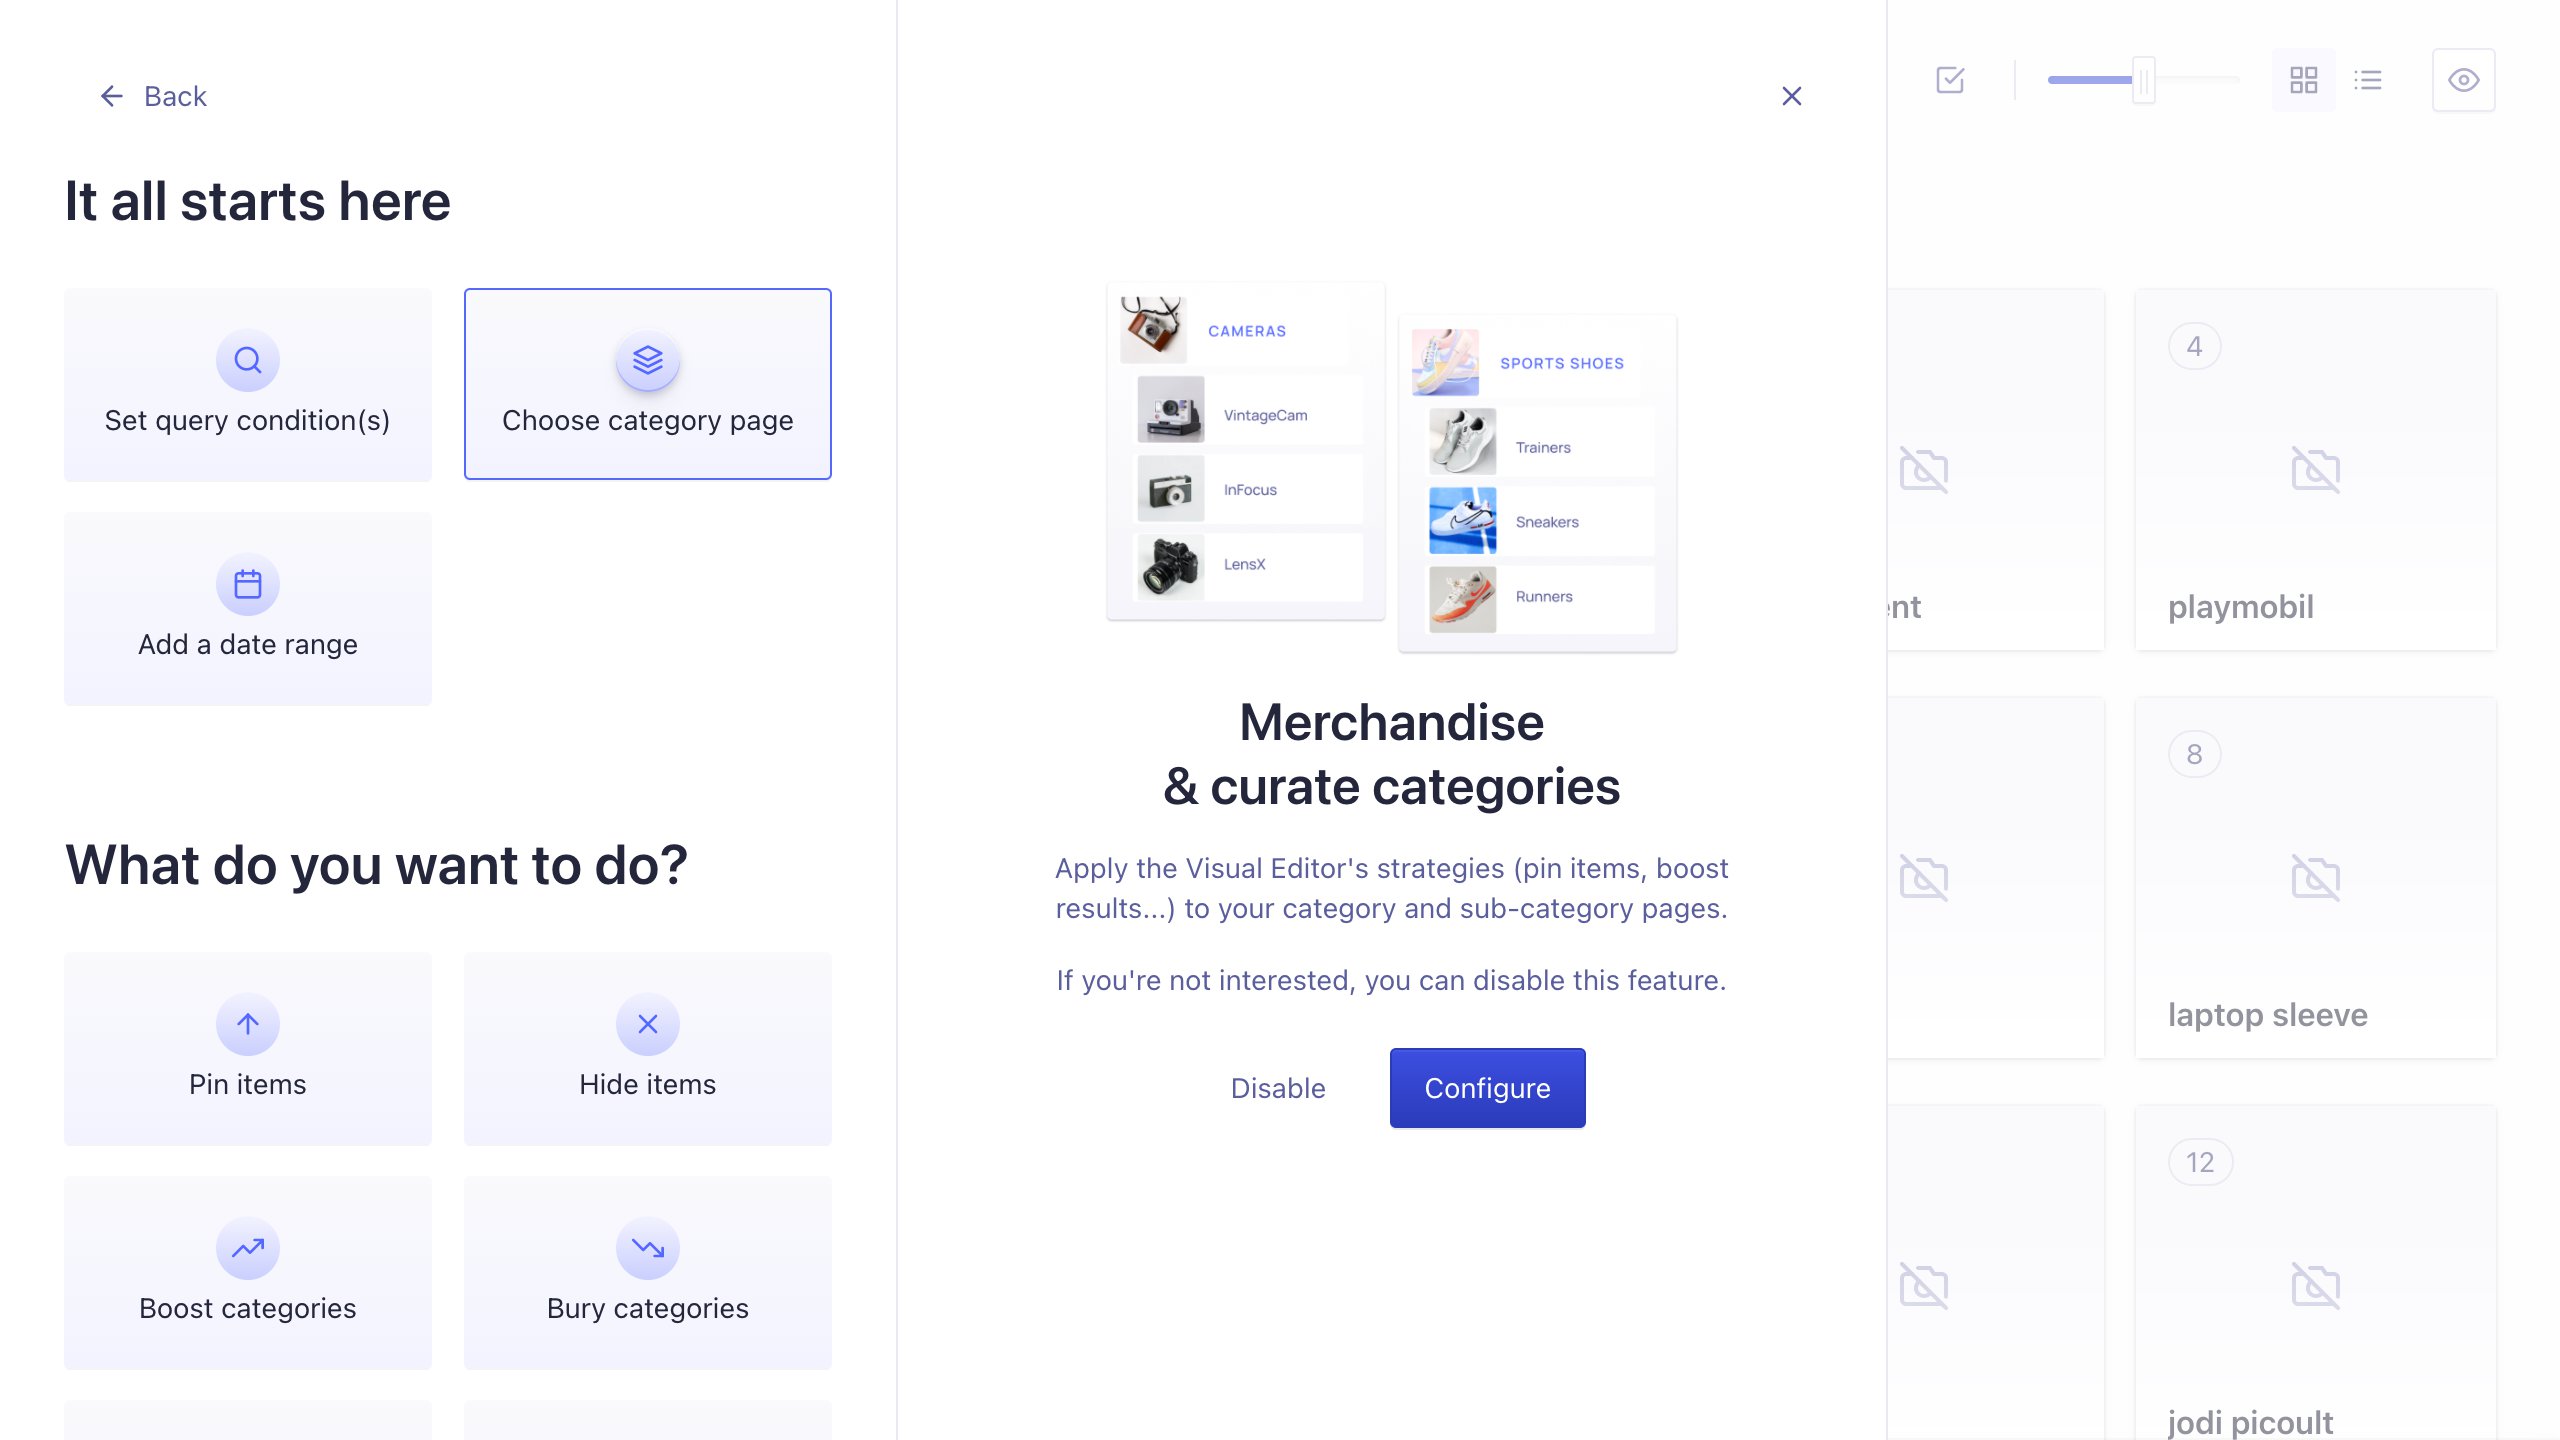
In the It all starts here section, select Choose category page and click Configure.
-
Set up your display preferences. See Merchandising category pages for more information.
-
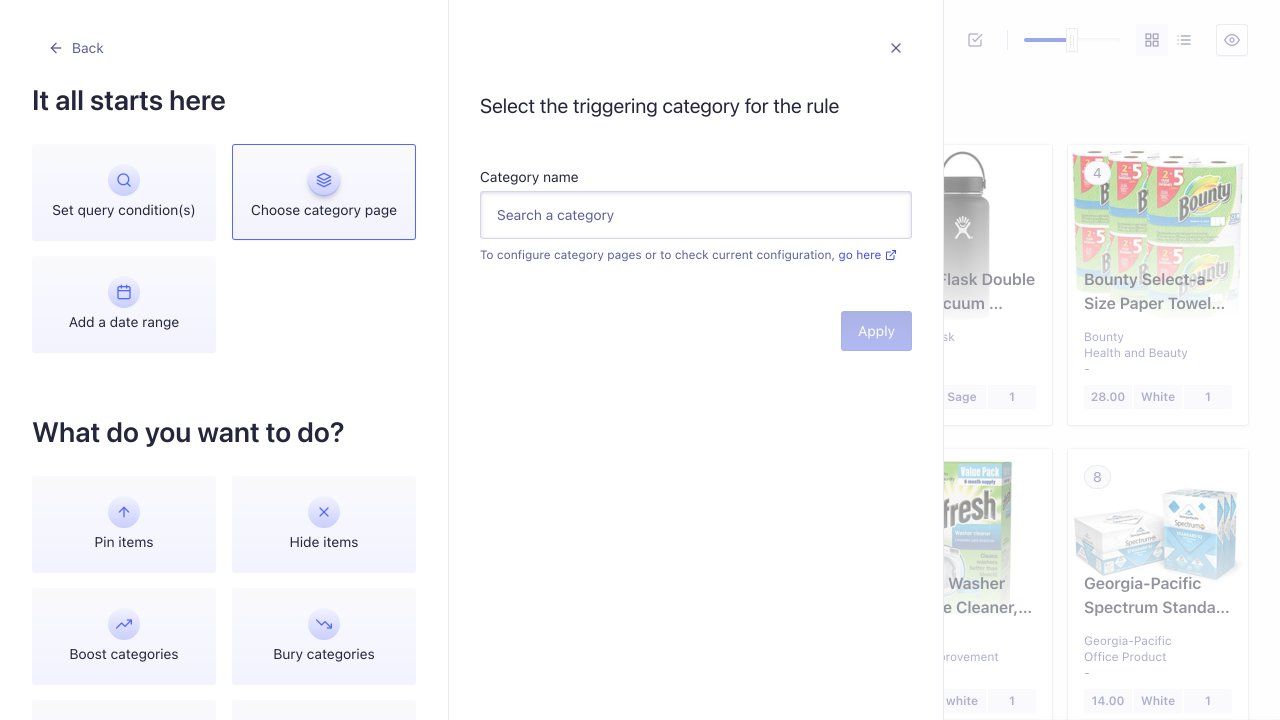
Select the name of the category page and apply a merchandising Rule to it. Define the condition (when the Rule should apply) and one or more consequences (the Rule’s effect).
-
Preview the effect of the new Rule in the Visual Editor.
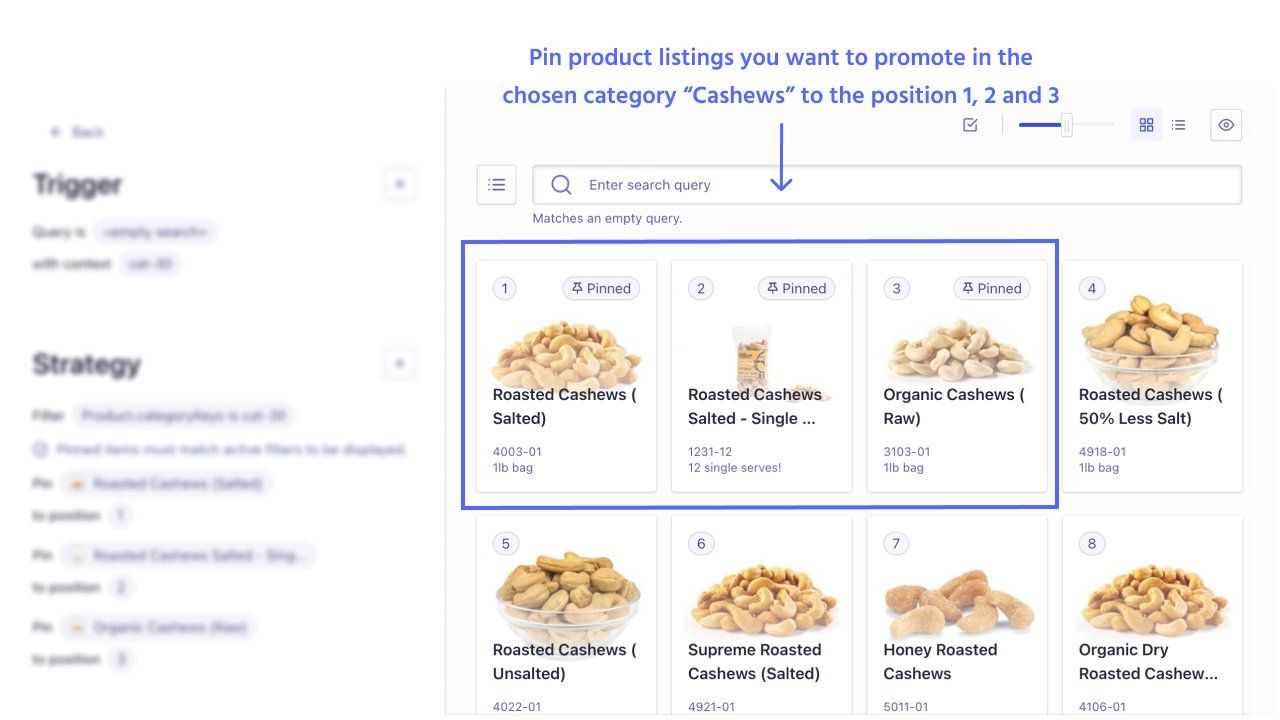
In the example, selected products from the category “Cashews” are pinned to positions 1, 2, and 3.
Merchandising categories with the Manual Editor
To merchandise categories with the Manual Editor, follow these steps:
- Go to the Rules section of the Algolia dashboard.
- Select the index to which you want to add Rules.
-
Click New Rule and select Manual Editor.
-
Create a new Rule:
-
Define the condition:
- Set Query to empty (users didn’t search for anything but browsed a category page).
- Set Context to the category you want the Rule to affect.
- Optional: set up a specific filter for the chosen category page

-
Define the consequences. For example, redirect users selecting a sci-fi book category to a promotional landing page for this category using the Return custom data option. Alternatively, users selecting the same category see the book “Dune” featured at the top of the page using the Pin an item option.
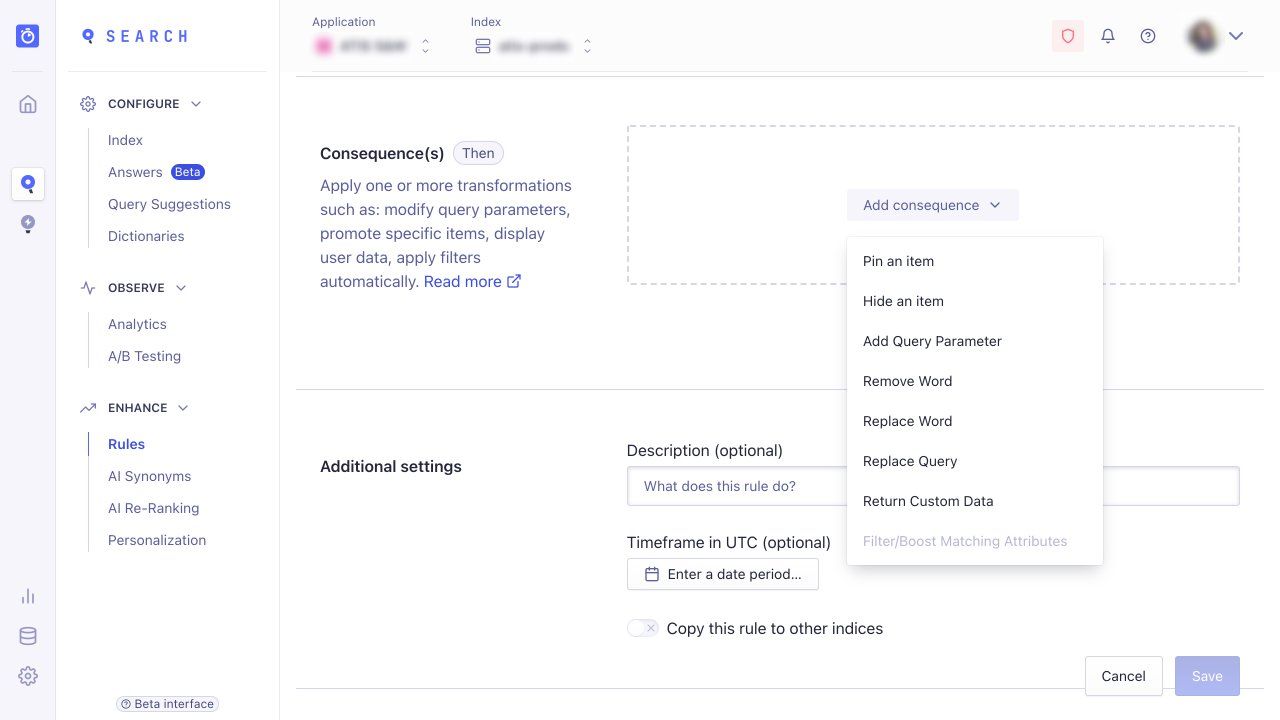
-
Optional: add a description for this Rule and a time frame if the Rule should only apply for a limited period, for example, for a promotional campaign.
-
