How to Use the Visual Editor for Merchandising Category Pages
On this page
You can power your category pages with Algolia and use the Visual Editor to easily tweak and customize those pages. It allows you to optimize the results to match your business goals or your merchandising guidelines.

Getting started
What are category pages?
Category pages are listing pages. In ecommerce, the product listing page is a gateway to the product detail page. Examples of category pages include: on sale, new arrivals, brands, product types, gender, size, or color.
Category pages can be any page that is already filtered on.
What can I do in the Visual Editor?
The Visual Editor lets your merchandising and editorial teams take full control of their catalog presentation. They can, for example:
- Run campaigns on search and categories alike
- Create a consistent and engaging experience across your entire platform
- Ease your merchandisers/curators life (productivity gains, operational efficiency)
All the strategies (drag & drop, pin or hide items, boost, bury, etc.) that let you reposition your search results in an interactive and visual way are available for category pages too.
Check your category page implementation
First of all, make sure that your website uses Algolia to power the category pages.
- If this isn’t yet the case, learn the steps needed to implement category pages.
- If you already use Algolia on your category pages:
- Know that Algolia is a flexible solution and you can implement category pages in different ways.
- Whatever type of implementation, you should be able to use the Visual Editor to merchandise category pages.
- However, it’s only with the recommended implementation, powered by sending an API request with an empty query and a
filterparameter based on a category page identifier, that you can use the optimized experience for the category page merchandising.
There are lots of benefits to using Algolia for your category pages: speed and performance, merchandising, Personalization, AI, and more.
Configure the Visual Editor
If you aren’t using the recommended implementation, you can’t use the optimized experience of category merchandising in the Visual Editor. In that case, you don’t have anything to configure, but the user experience to merchandise category pages is more tedious. Follow the detailed guide to get started.
If you are using the recommended implementation, you can then configure the Visual Editor to use the optimized experience of category merchandising.
There are two ways to do that.
- If you are the first user on your app to configure category pages on the Visual Editor, select Choose category page under the It all starts here section of the Visual Editor, and follow the instructions.
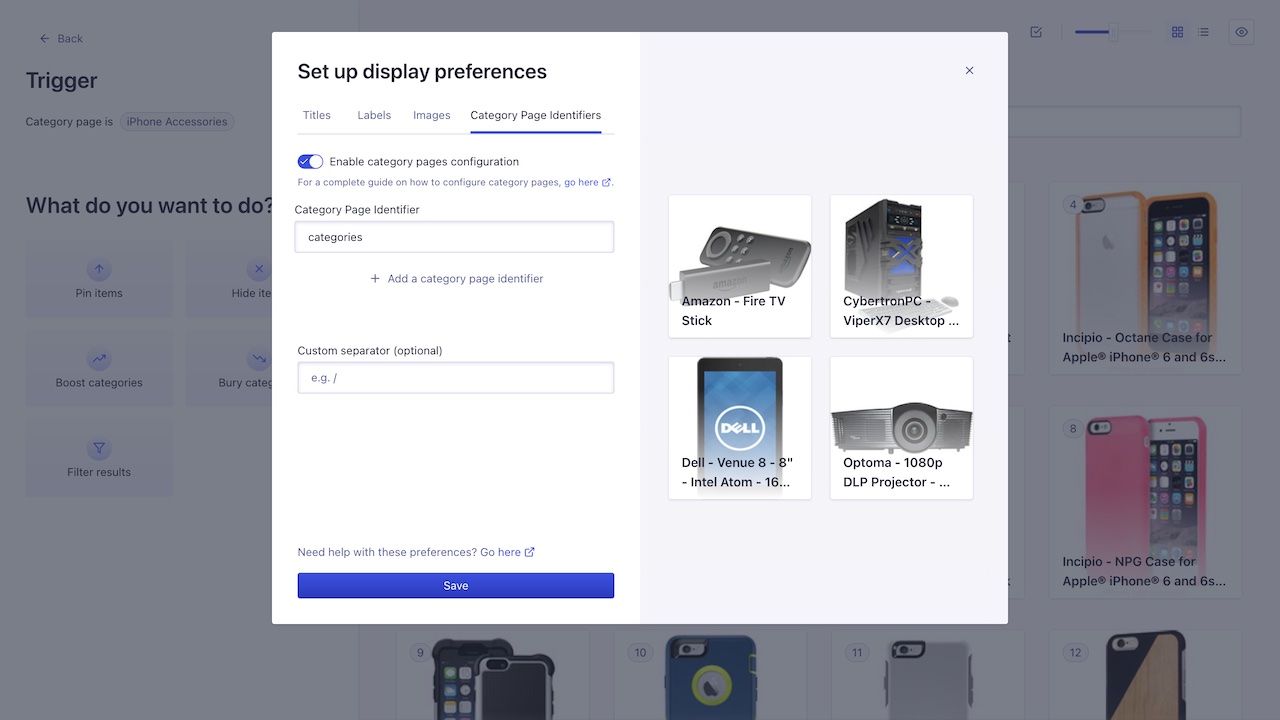
- Otherwise, click on the Set Up Display Preferences button at the top right of the Visual Editor.
From both entry points, you can access the Display preferences section. Go to the Category Page identifiers tab and select the Category Page Identifier used to define your category pages. Note that the attributes used as Category Page Identifier must be defined as searchable facets in your index settings. Save your changes.
Merchandise your category pages
After finishing the configuration of the Visual Editor:
- In the It all starts here section, select Choose category page
- Search and select the category page you want to merchandise
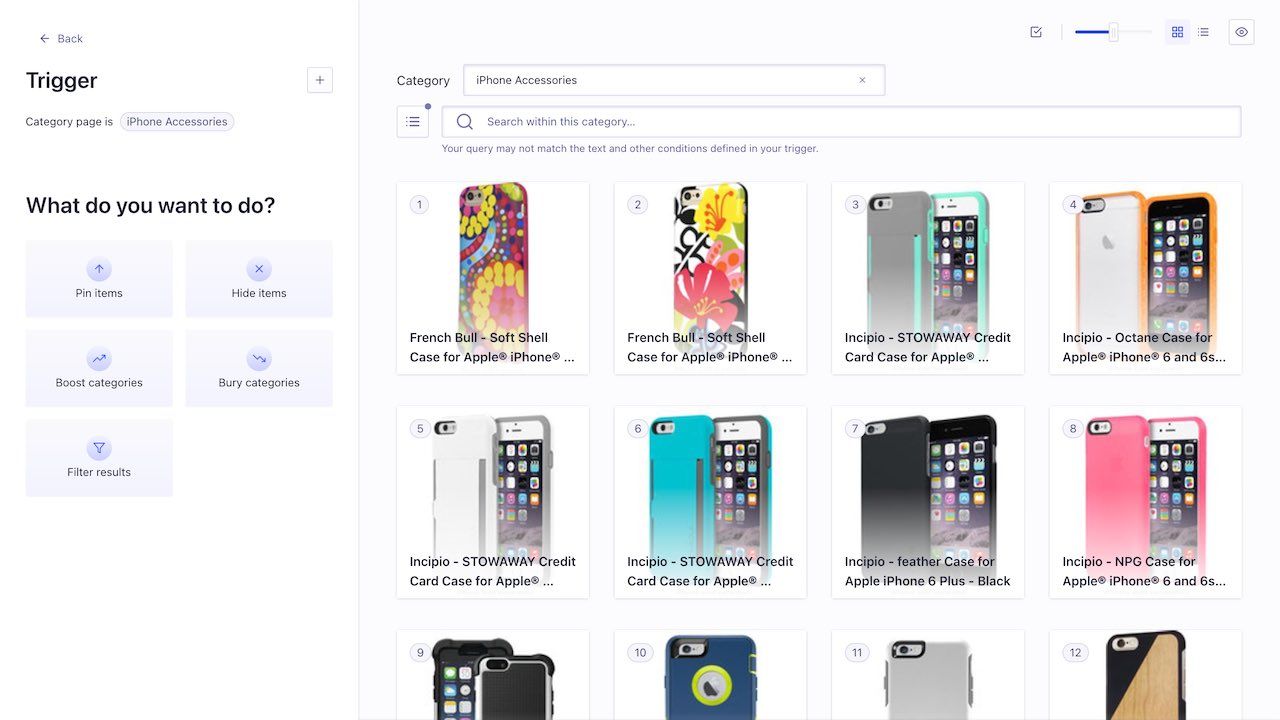
- The category page appears, and you can start to merchandise it
- In the What do you want to do? section, you can use different strategies:
- Pin items
- Hide items
- Boost
- Bury
- Filter
- You can also drag and drop items directly on the right side of the screen
- Click Apply and don’t forget to save your changes.