Enabling AI Re-Ranking
Before you can use AI re-ranking, you have to track click and conversion events with Algolia. Coordinate with your data or front-end engineering team to implement event tracking.
AI re-ranking analyzes which search results users click and ranks them higher.
To simulate and activate AI re-ranking, follow these steps:
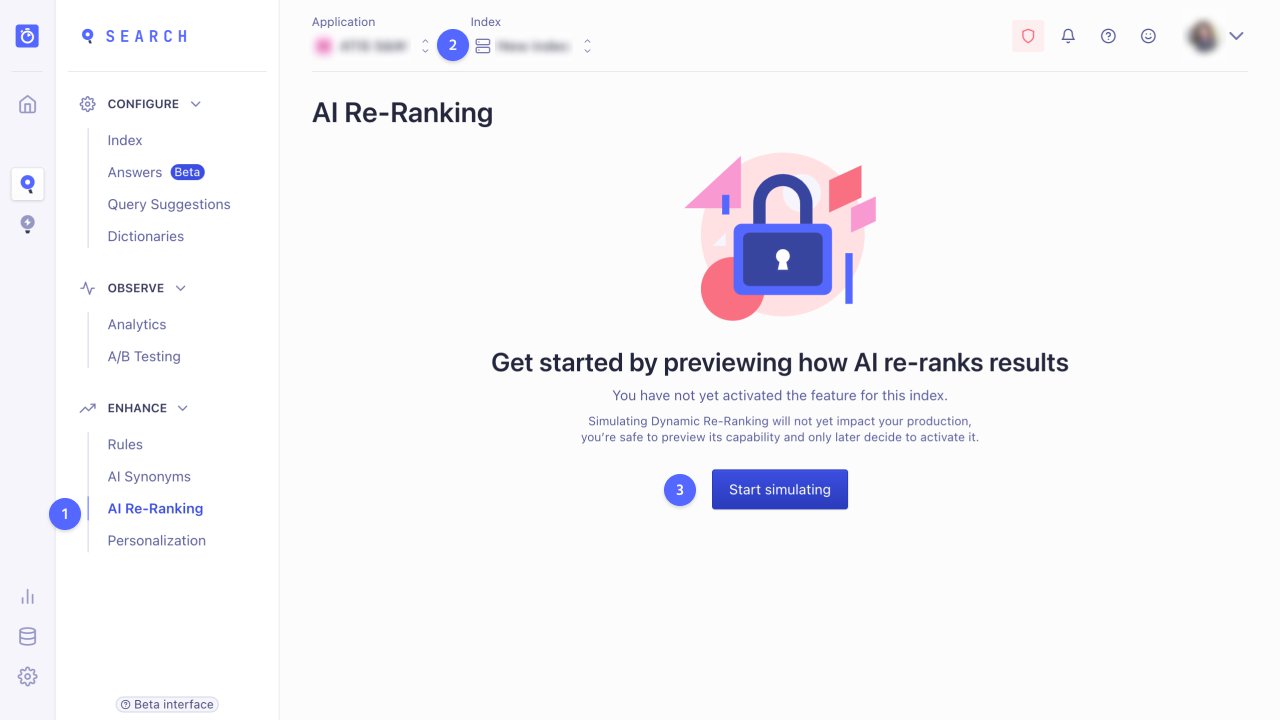
- Go to the AI re-ranking page in the Algolia dashboard.
- Select the index for which you want to enable AI re-ranking.
-
Click Start simulating and wait for the simulator to be ready.

-
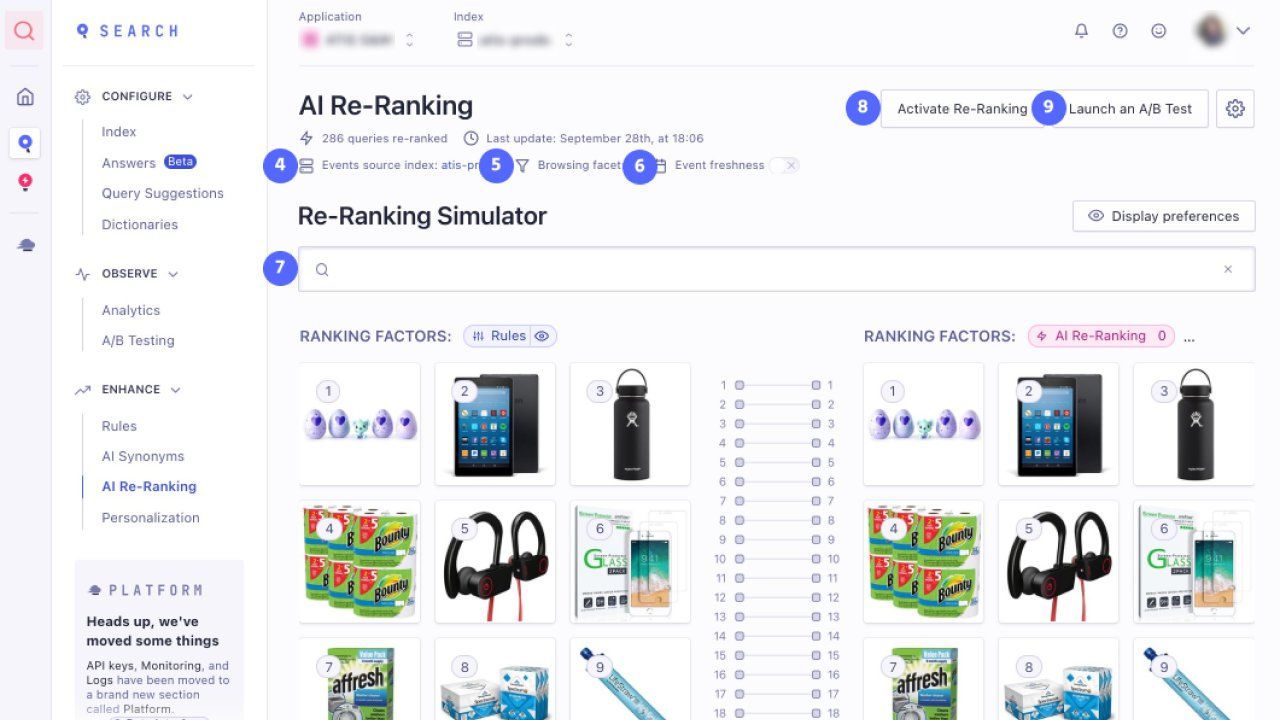
Change the Events source index if you want to use a different index to source your user events. By default, AI re-ranking uses the events for the re-ranked index.
-
Select the Browsing facet option to turn on re-ranking on browsing pages. By default, Algolia doesn’t dynamically re-rank empty queries. Setting a browsing facet enables re-ranking on empty queries with facet filters for that facet.
-
Enable Event freshness to give more weight to recent events. This setting improves seasonality and short-term search trends.
-
Simulate the effect of re-ranking by typing sample queries in the Re-ranking Simulator and review the results. On the left of the Re-ranking simulator, you’ll see the results without re-ranking. In the middle, you can see how the order of the search results for a given query changes due to re-ranking. On the right, you’ll see the results after AI re-ranking is applied.
- Select Activate Re-Ranking to turn on AI re-ranking in production.
-
Launch an A/B test for AI re-ranking.

-
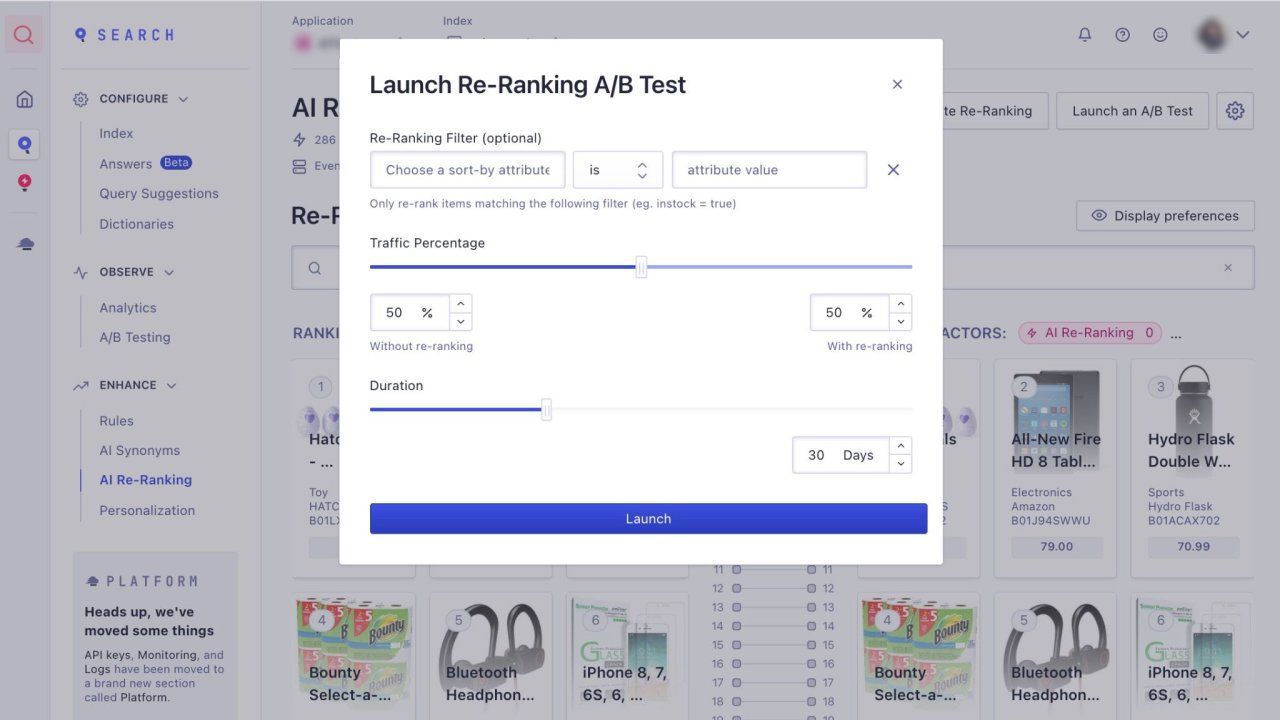
In the Launch Re-ranking A/B Test dialog, select the traffic split, test duration, and an optional Re-ranking filter. For example, if you want to turn on re-ranking only for products that are in-stock, select
instock = trueas re-ranking filter.
